Coxinhas – Brazilian Chicken Croquettes
Coxinhas are crispy chicken croquettes that are a popular street food choice in Brazil. Learn how to make this delicious Brazilian snack in two ways – baked and fried!
As an Amazon Associate, I earn from qualifying purchases.
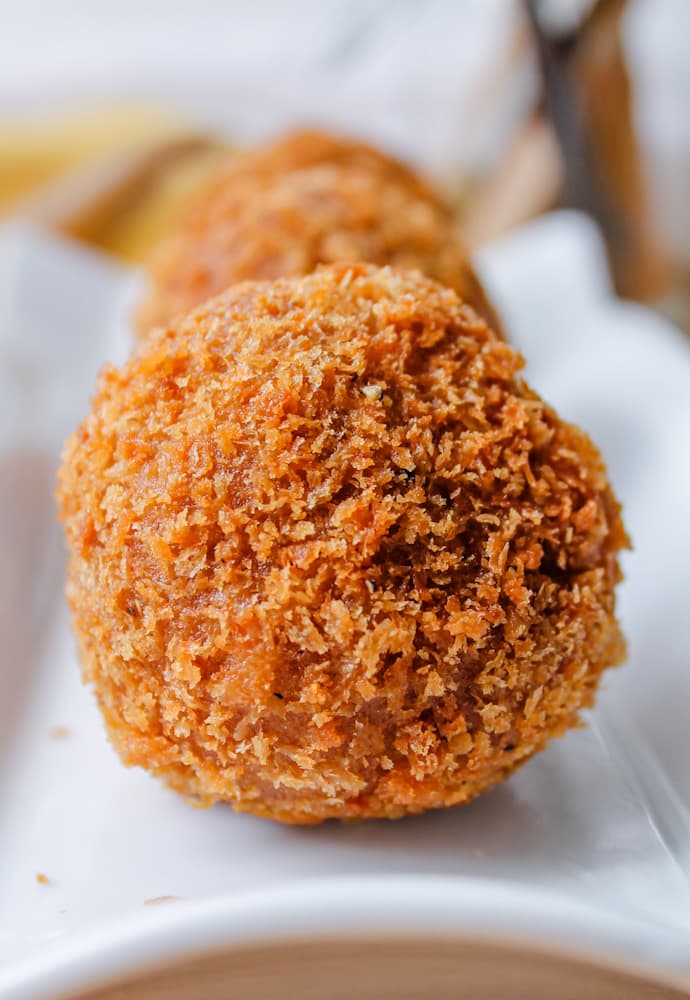
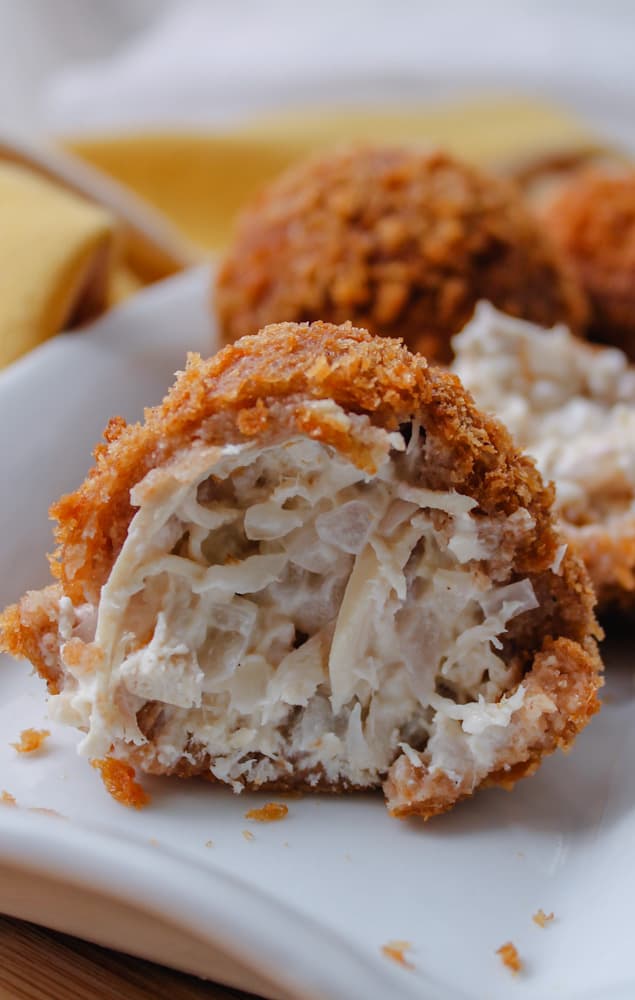
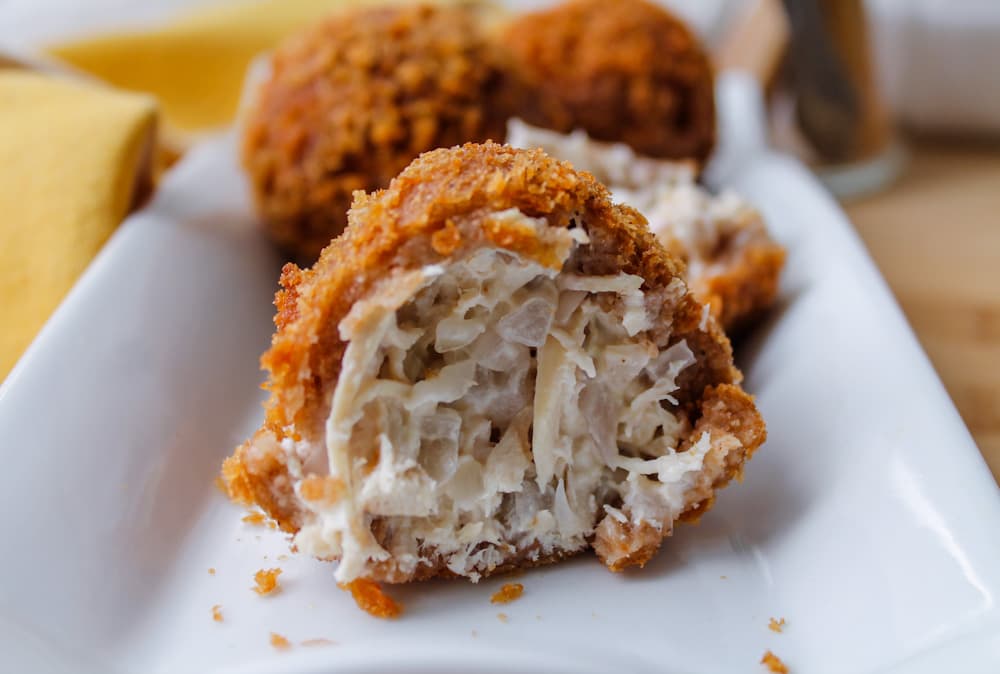
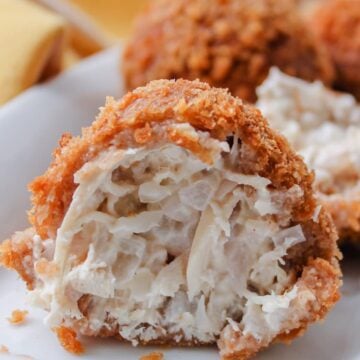
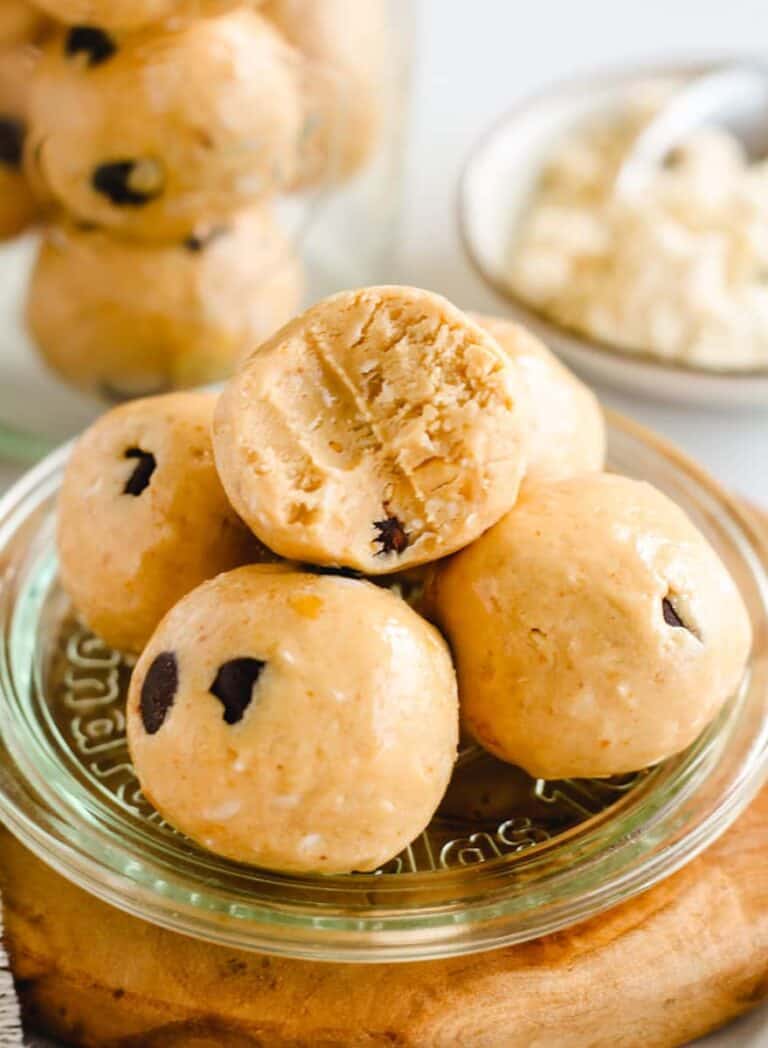
These tasty appetizers are Brazilian street food called Coxinhas (coxinha pronunciation is co-sheen-ya) and they are crispy balls filled with chicken salad. They are known as coxinhas de galinha in Portuguese.
IN THIS POST: Everything you need to make Brazilian Coxinha
I will warn you now before you get any further that this coxinha recipe is a bit of a process.
Two days to be exact!
The dough and the chicken salad benefit from a night in the fridge so if you do plan on making this dish, be prepared for some extra organization.
Ingredients
- chicken breasts
- chicken broth
- carrot
- onions
- bay leaves
- cream cheese
- lime juice
- garlic cloves
- butter
- flour
- eggs
- breadcrumbs
- salt and black pepper
- olive oil
Instructions for this recipe
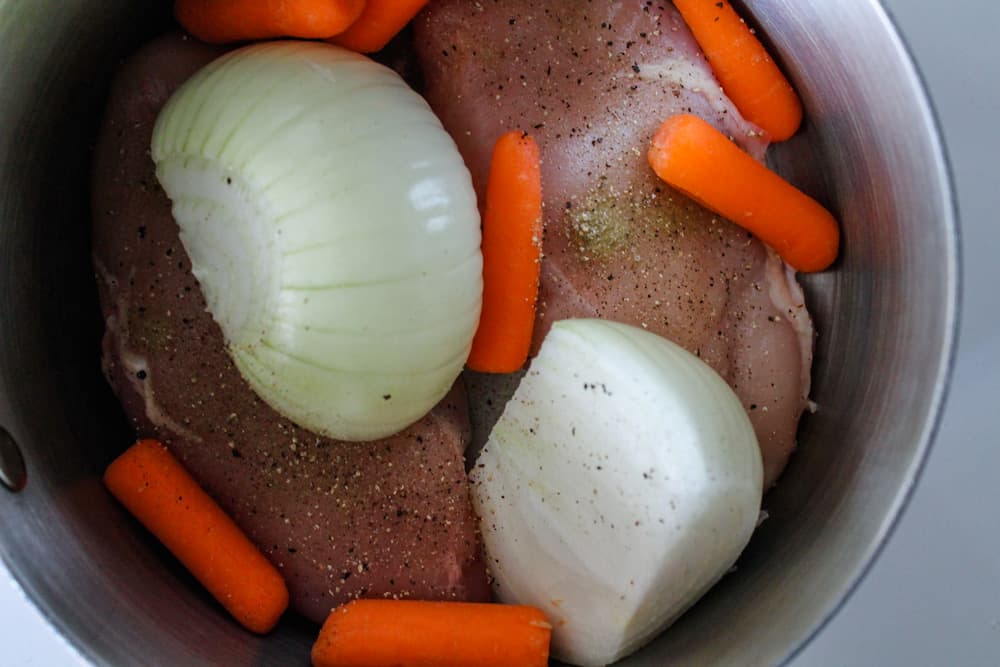
First, poach the chicken in water with the carrots, onion, and bay leaves.
Once it is cooked, set it aside to cool a bit before shredding it. I use a couple of forks to shred but a hand mixer works well also.
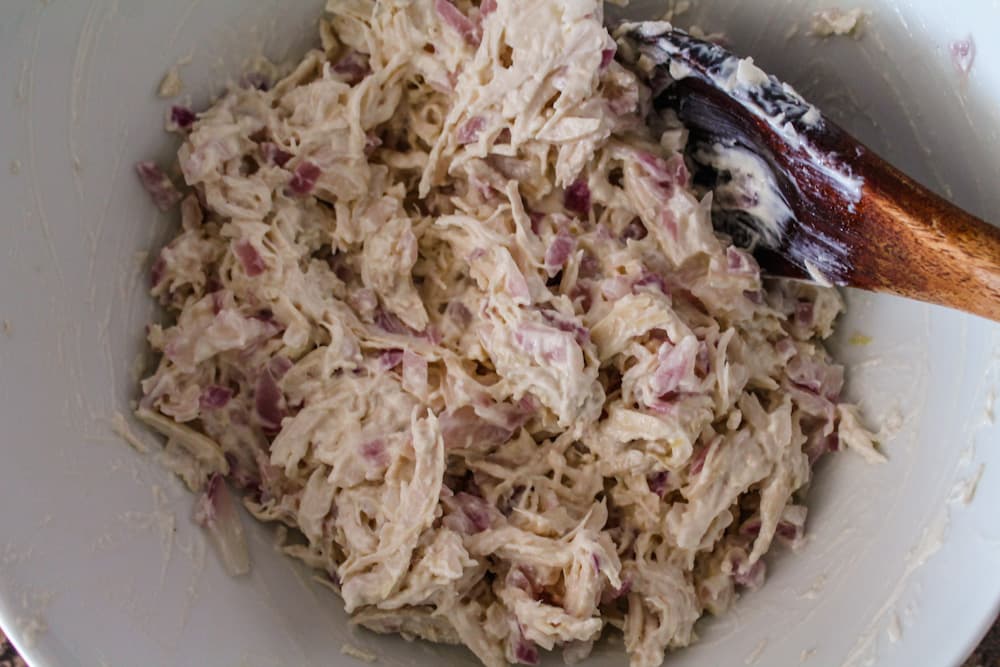
Place the shredded chicken in a bowl and stir in the softened cream cheese and lime juice.
Saute onions and garlic in the butter in a hot skillet, and mix it into the chicken and cream cheese mixture. Season it with salt and pepper to taste. Cover the bowl and pop it into the fridge.
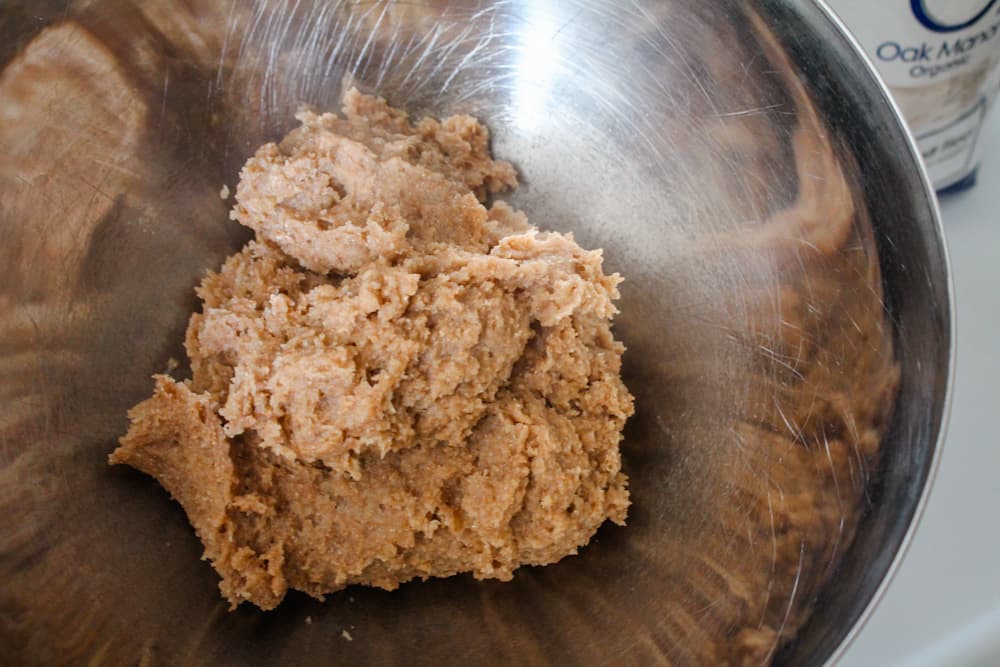
Next, get started on the dough. Pour the chicken stock into a large saucepan and bring it to a boil. Add the flour bit by bit, stirring vigorously while you add it. The dough will begin to form as you stir. This takes about 2-3 minutes.
Remove the dough from the heat and place it in a bowl.
Cover the dough and pop it into the fridge also. Leave both the dough and the chicken salad in the fridge overnight.
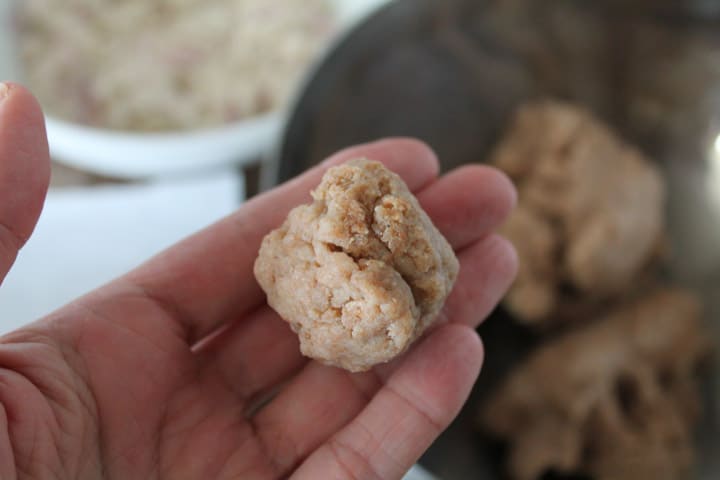
The next day set up your rolling station! Use a small scoop to portion out the balls of chicken salad onto a plate. I use a small cookie scoop.
Next, roll out the coxinha dough.
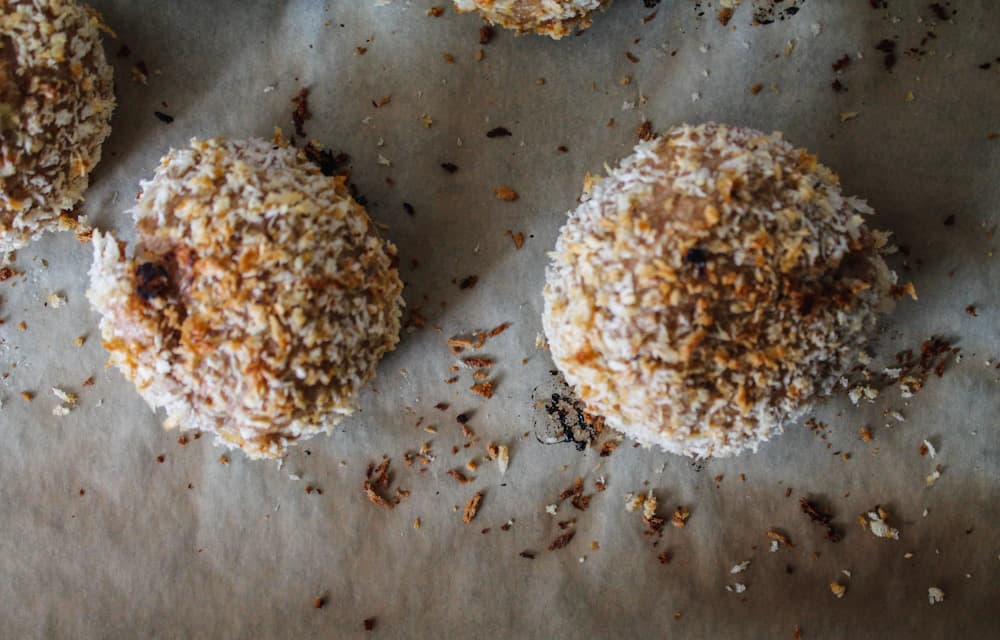
Roll a golf ball-sized piece of the dough in your palm. Then flatten it out evenly before popping a ball of chicken in the center and wrapping the dough around it. Place them on a baking sheet.
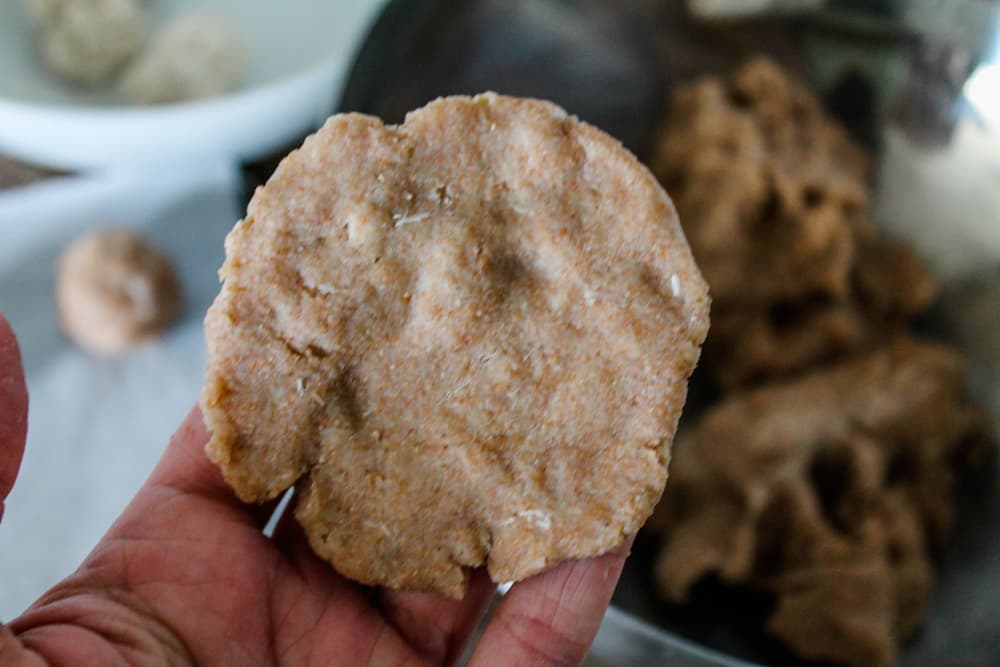
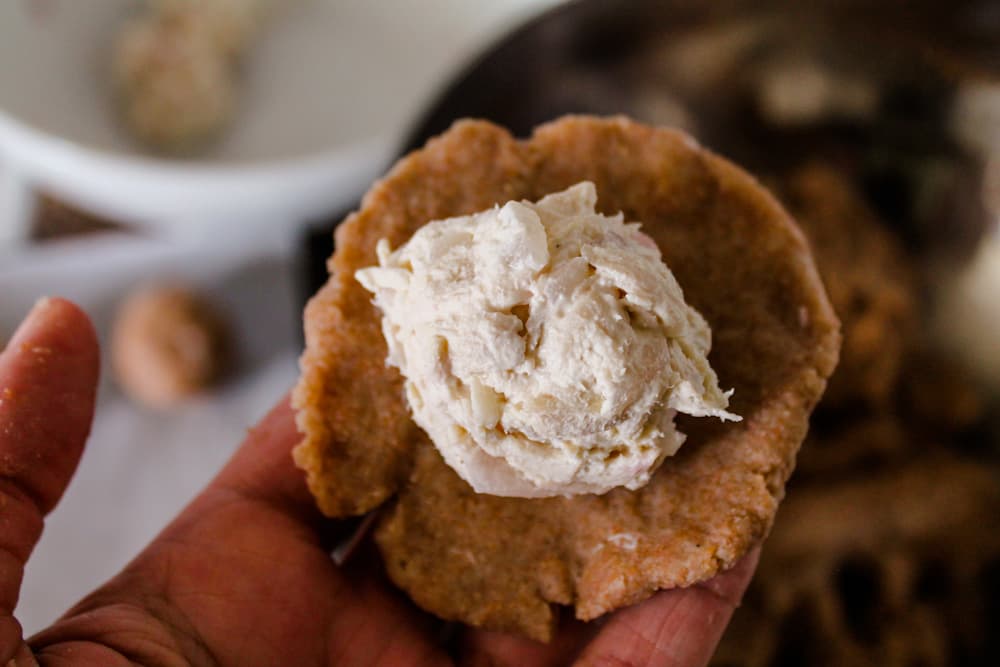
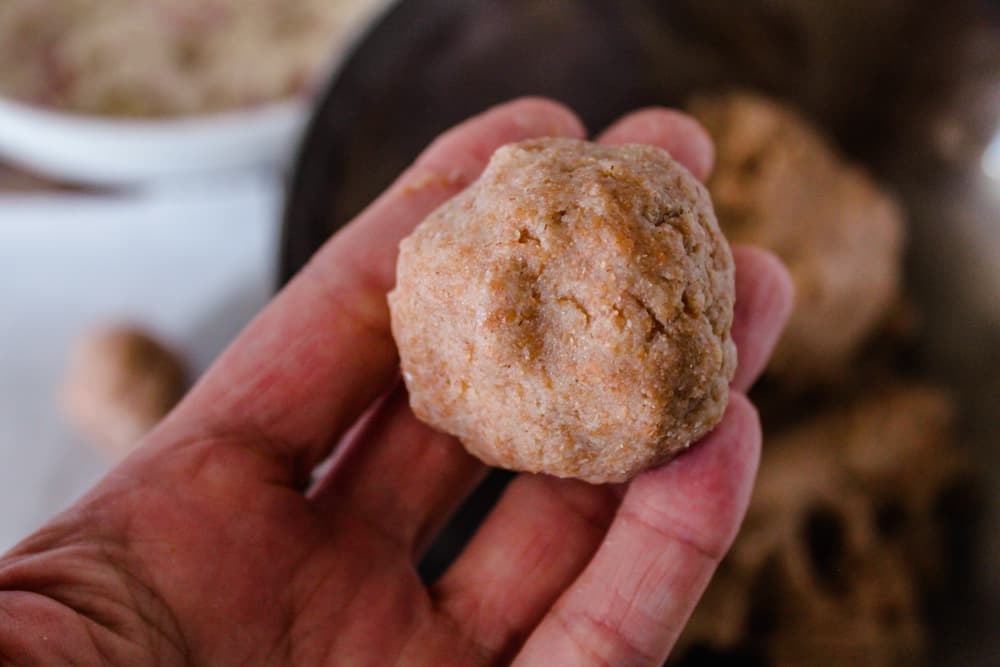
Typically, you would form the balls into a teardrop shape resembling chicken drumsticks. The drumstick shape is supposed to look like a little thigh. I actually forgot that part when taking the photos. Oops! Luckily, it doesn’t affect the delicious flavor.
Once all of the coxinhas have been prepped, set up your breading station.
A beaten egg and some bread crumbs in a couple of bowls do the trick.
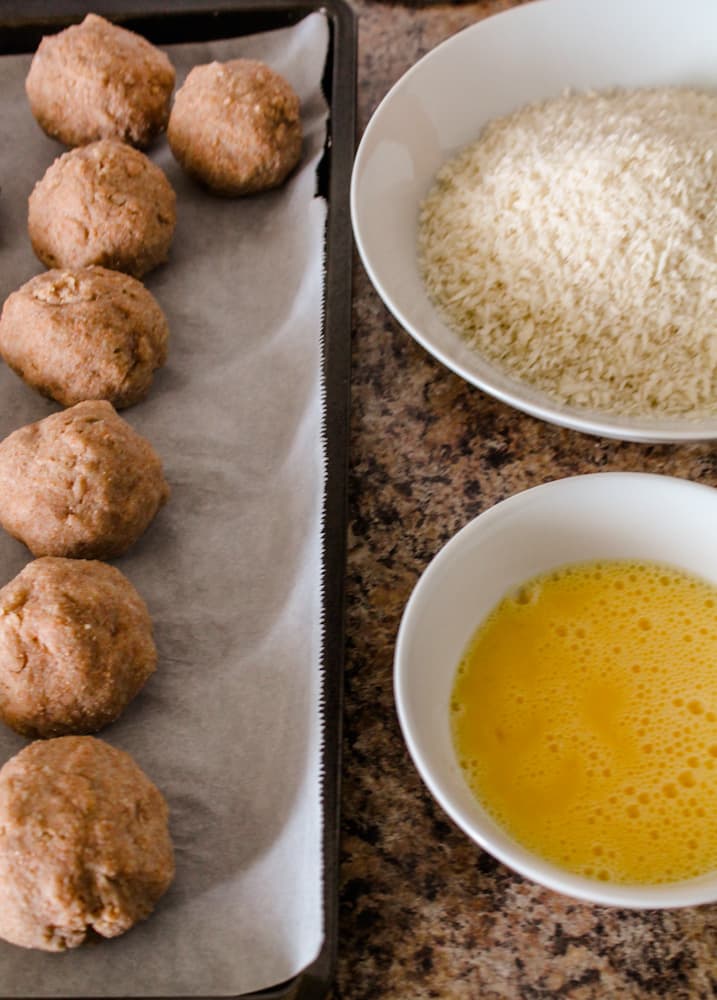
Dip each ball in the egg then roll it in the bread crumbs. Place them back on the baking sheet.
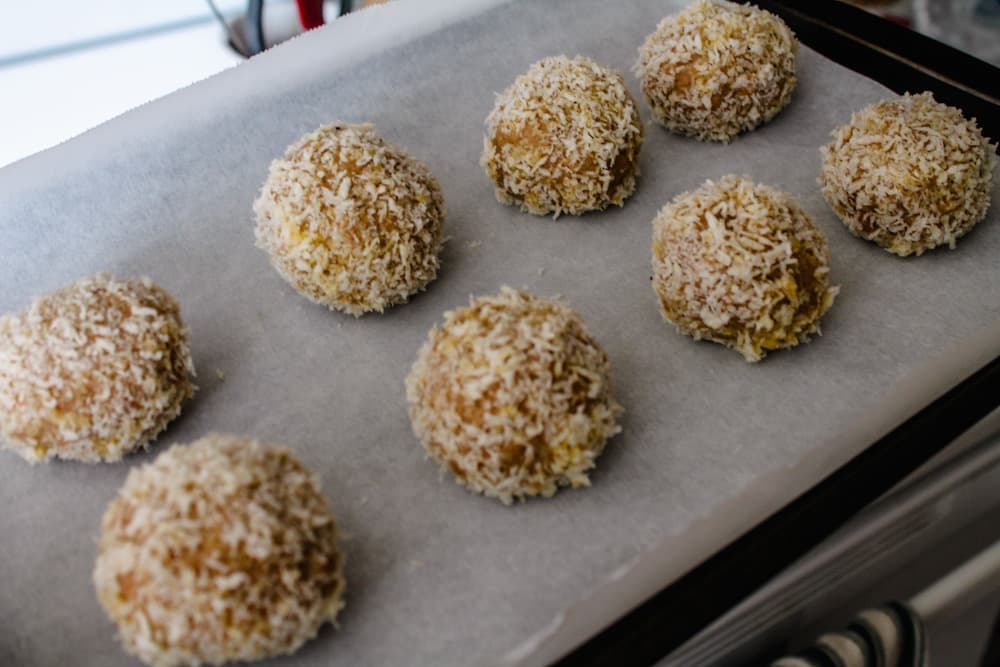
Cooking Methods
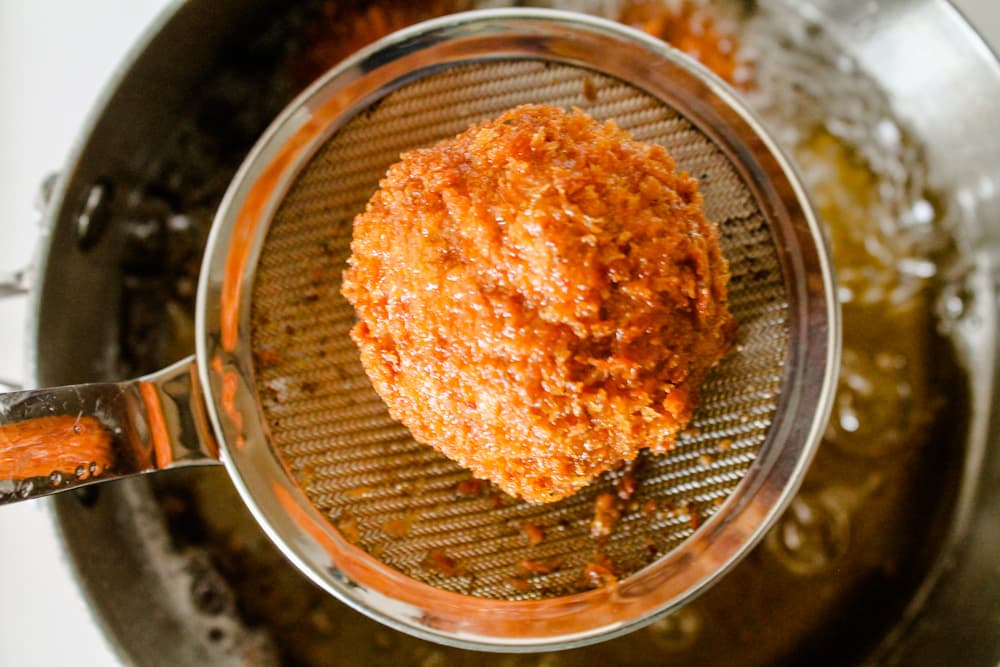
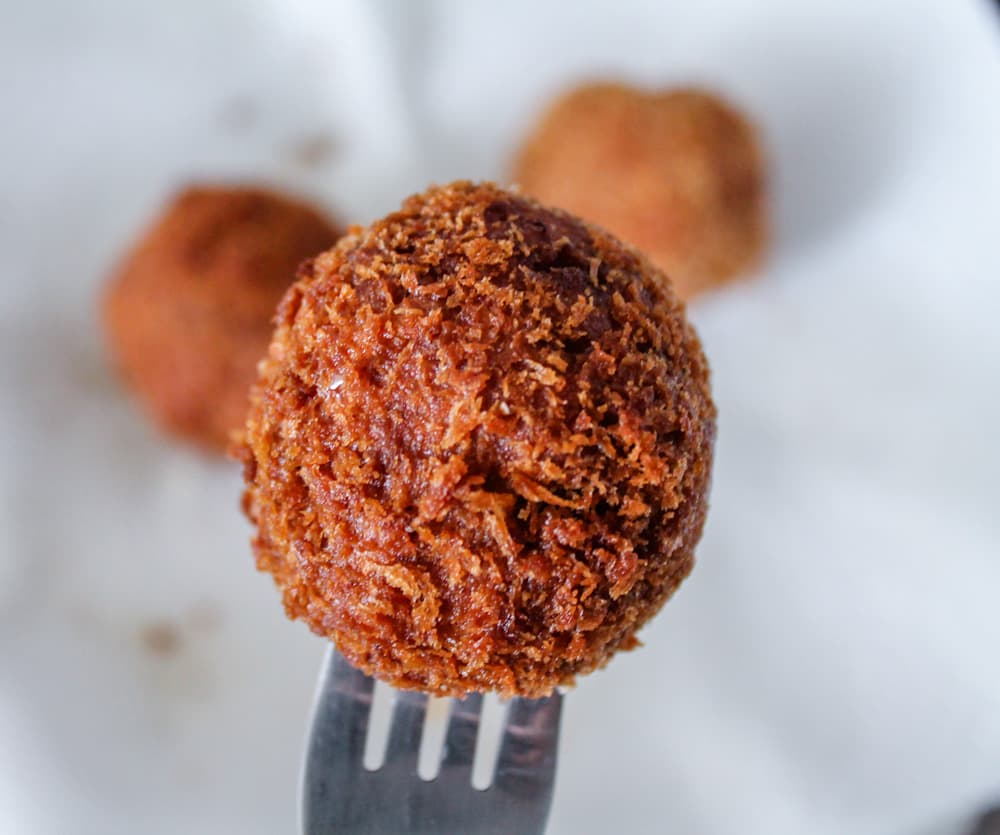
Finally, we cook them! They are traditionally deep-fried but I also oven-bake them also.
For the deep fry method start with a pot of oil and heat it 360. Carefully drop the balls in and cook them until they are golden brown. Scoop them out of the hot liquid using a spider strainer.
For the baked method, pop them on a parchment-lined baking sheet and bake for 20-25 minutes in an oven preheated to 400.
Rotate the balls on the pan a few times while baking to prevent burning in one spot.
The verdict for taste on each method is pretty close!
The fried version looks better and was slightly crispier but all in all the baked version was just as good, so if you want to save the empty calories and enjoy a healthier version, go with the oven. ?
FAQs, Tips, and Substitutions
- Why is it called a coxinha? It stems from the word coxa – meaning chicken drumstick. Coxinha translates from Portuguese as “little thigh”. When pinched at the top they resemble a bite-sized chicken drumstick.
- Try baking in the oven for a healthier alternative!
- We use olive oil for frying but you could substitute any vegetable oil.
- Spelt flour is our primary choice but all-purpose flour works also.
More appetizer recipes
- Homemade Tater Tots
- Hummus Deviled Eggs
- Onion Ring Sauce
- Chipotle Black Bean Dip
- Alabama Firecrackers
Looking for another delicious appetizer? Try this tasty recipe for quipe which is a popular Dominican party must-have.
*This recipe was originally posted on June 20, 2014, and updated on October 20, 2022, with recipe notes, writing, and new photos.*
If you’ve tried our Brazilian Coxinhas, please rate the recipe and let me know how it turned out by leaving me a comment below. I’m always interested in feedback!
Be sure to follow me on social media! I love pinning to Pinterest, sharing on Facebook, and posting pics on Instagram. See you there. 🙂
As an Amazon Associate, I earn from qualifying purchases.
Want to Save This Recipe?
Just enter your email and get it sent to your inbox! Plus you’ll get new recipes from us every week.
By submitting this form, you consent to receive emails from The Honour System
Brazilian Coxinhas – Crispy Chicken Croquettes
Equipment
Ingredients
- 2 chicken breasts
- 1 cup baby carrots
- 2 medium onions
- 2 bay leaves
- 8 ounces cream cheese
- 2 tbsp lime juice
- 2 cloves garlic
- 2 tbsp butter
- 3 cups flour
- 2 eggs
- 3 cups breadcrumbs
- oil for frying
Instructions
- Add the chicken breasts, carrots, and one of the onions, peeled and cut in half to a medium sauce pot. Cover with water and over medium heat bring to a simmer. Gently simmer the chicken for 15-20 minutes unti cooked through.
- Strain the liquid and set the chicken aside to cool a bit before shredding. Place the shredded chicken in a bowl and stir in the lime juice and softened cream cheese.
- Dice the second onion and mince the garlic cloves. Heat the butter in a skillet over medium heat and add the diced onions. Saute until translucent and add the minced garlic. Stir for another minute, then scrape the onion mixture into the bowl with the chicken. Stir again well. Cover the bowl and place in the fridge.
- Pour the chicken broth into a large saucepan and bring it to a boil. Add the flour, bit by bit, stirring vigorously as you add it. The dough will begin to form as you stir. This takes about 2-3 minutes.
- Remove the dough from the heat and transfer it to a bowl. Cover the bowl and refrigerate for 2-3 hours or overnight.
- Using a small scoop portion out tablespoon-sized balls of the chicken salad onto a plate.
- Next, roll out the dough. Roll a golf ball sized portion in your hand then flatten it out. Place the ball of chicken salad inside and wrap the dough around it. Pinch the end to make a drumstick shape for an authentic look! Place the balls on a tray. There should be close to two dozen.
- Set up a breading station. Beat the 2 eggs in a bowl and place the breadcrumbs in another bowl. Dip the balls into the egg and then roll them in the breadcrumbs. Place them back on the tray.
- To deep fry them, set a large pot of oil over medium-high heat – use just enough oil to cover the balls. When the oil is 360° carefully drop the balls in. Cook until they are golden brown then remove them using a spider strainer and place them on a paper towel-lined plate to drain.
- To oven bake – heat the oven to 400 and bake for 20 – 25 minutes, moving the balls around 2 or 3 times to cook them evenly.
- Enjoy warm!
Video
Notes
- Try baking in the oven for a healthier alternative!
- We use olive oil for frying but you could substitute any vegetable oil.
- Spelt flour is our primary choice but all-purpose flour works also.

What a fun food to celebrate the World Cup! We’ve been watching A LOT of the World Cup action at our house – both because it’s just plain exciting, and also because my son is a soccer player. We need some of these to munch while we watch, no doubt! I especially love that you tested them two ways, so you could honestly report that baking is a totally acceptable (and much healthier!!) option! Yum! 😀
I had a comment on facebook that toasting the panko breadcrumbs first will give the baked variety a nicer appearance. Great advice, I thought! I hope you’re enjoying the soccer action. The USA team is doing great also! I wish Canada took it’s National soccer program more seriously. Our women’s team is awesome but the men’s, not so much. Have a great weekend, Shelley!
These look delicious Sharon. I’ve never had these before, but I love all the ingredients.
Oh and our house has World cup on all day. My son is obsessed!
I knew I wasn’t alone. 🙂 I love the ‘beautiful game’. These are good. Worth the effort to try something different. Have a great weekend Cindy!
I love you post a Brazilian recipe. I am Brazilian, but I’ve lived in Canada for so many years. I cook some Brazilian food sometimes. I wish I could make it often, but it is hard to find some ingredients around here. You did a very good job. They look great 😉
So cool! Thanks so much, Olivia. 🙂 I know these usually have a certain kind of Brazilian cheese, but I couldn’t find it where I live. Enjoy the rest of the World Cup. Two of my teams (England & Spain) are already out so it looks like all my hopes rest with Germany. Maybe your Brazilians will take it home this year. Good luck!