Quinoa Pizza Crust Flatbread
If you’re looking for a gluten-free pizza crust that doesn’t taste like cardboard and requires minimal hands-on prep work, this is the recipe for you. This delicious quinoa pizza crust flatbread is the perfect thickness and texture, and can be easily customized with your favorite toppings.
As an Amazon Associate, I earn from qualifying purchases.

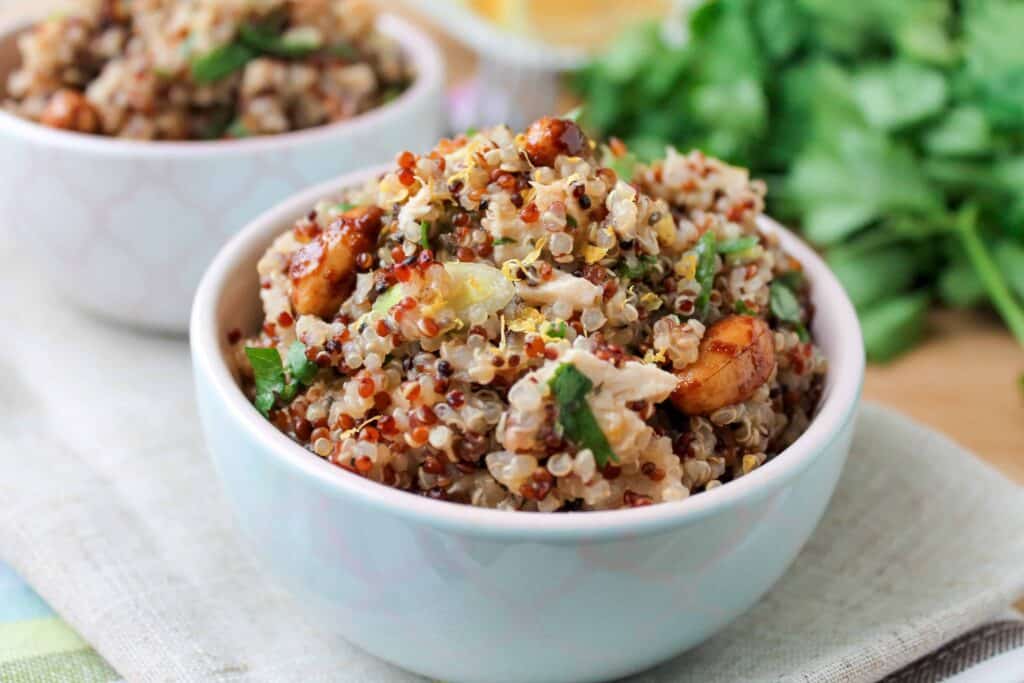
What is quinoa? Well, it’s a versatile seed packed with protein and fiber that I use to make a ton of tasty recipes, including this quinoa tabbouleh salad and these cheesy quinoa fritters. Yum! And guess what, you can even freeze quinoa, so you cut down on waste and save money. Boom.
Why we love this recipe
I can’t wait to share this quinoa flatbread! Like many of you, I’m sure, I’ve seen the countless recipes floating around for delicious cauliflower crusts that make pizza and flatbread-type snacks available to those who avoid the gluten. To be honest, each time I get to the part about squeezing and squeezing every last drop of moisture out of the cauliflower, I totally lose interest. Even though I know it would be incredible, I am far too lazy for that.
Then I read Lauren’s recipe for a quinoa crust (so far so good, love quinoa), which has a short ingredient list (looks good, I have all these ingredients), and no squeezing required! We have a winner, folks.
But instead of pizza crust, let’s spread the batter into a square pan and make a yummy gluten-free flatbread that we can customize any way we want.
It’s a super easy recipe to bang out, so it would be good for a family snack or even for guests, as long as they don’t mind the insane racket from the food processor. I hate that freakin’ noise from that blasted thing. There must be some ‘whisper’ technology that can be developed to tame down the jarring loudness.
The only really time-consuming thing is to soak your quinoa overnight. So it’s not hard … if you remember to do it! Don’t forget to soak the quinoa, people. 🙂 It is a crucial step.
Ok, let’s get started!

Ingredients
Find the complete ingredient list for this basic quinoa flatbread recipe, with measurements, in the recipe card below.
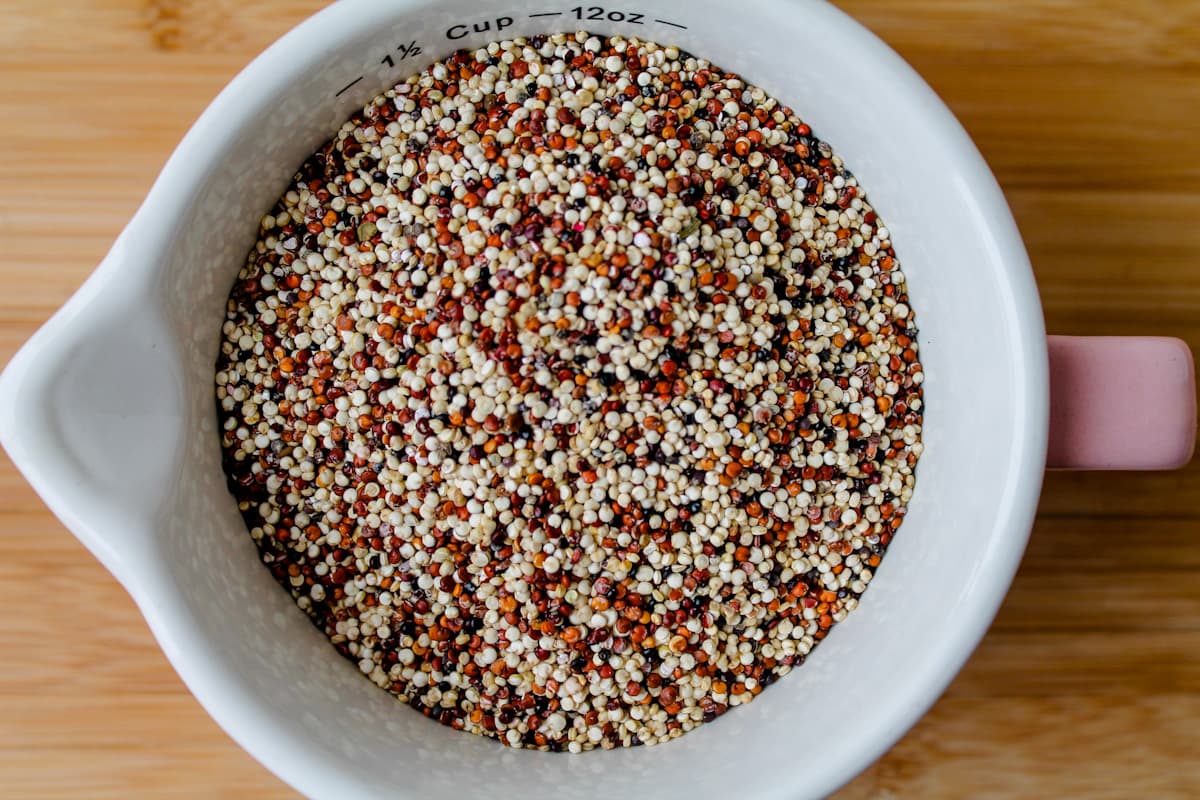
- Quinoa – I like using a tri-color quinoa. The flavors and textures of the different seeds really add to the ‘breadiness’ of this recipe.
- Salt – Of course, fine sea salt is a necessity. A pinch of salt brings out the best of your ingredients.
- Baking Powder – This helps your flatbread to rise and makes a bit of magic from your quinoa.
- Garlic – There are a few ways to do this. Low key just toss a couple of cloves in when you process the batter. Feeling fancy? Add a tablespoon or two of this roasted rosemary garlic puree. Omgsh so good.
- Olive Oil – To coat the pan and prevent any stickage.
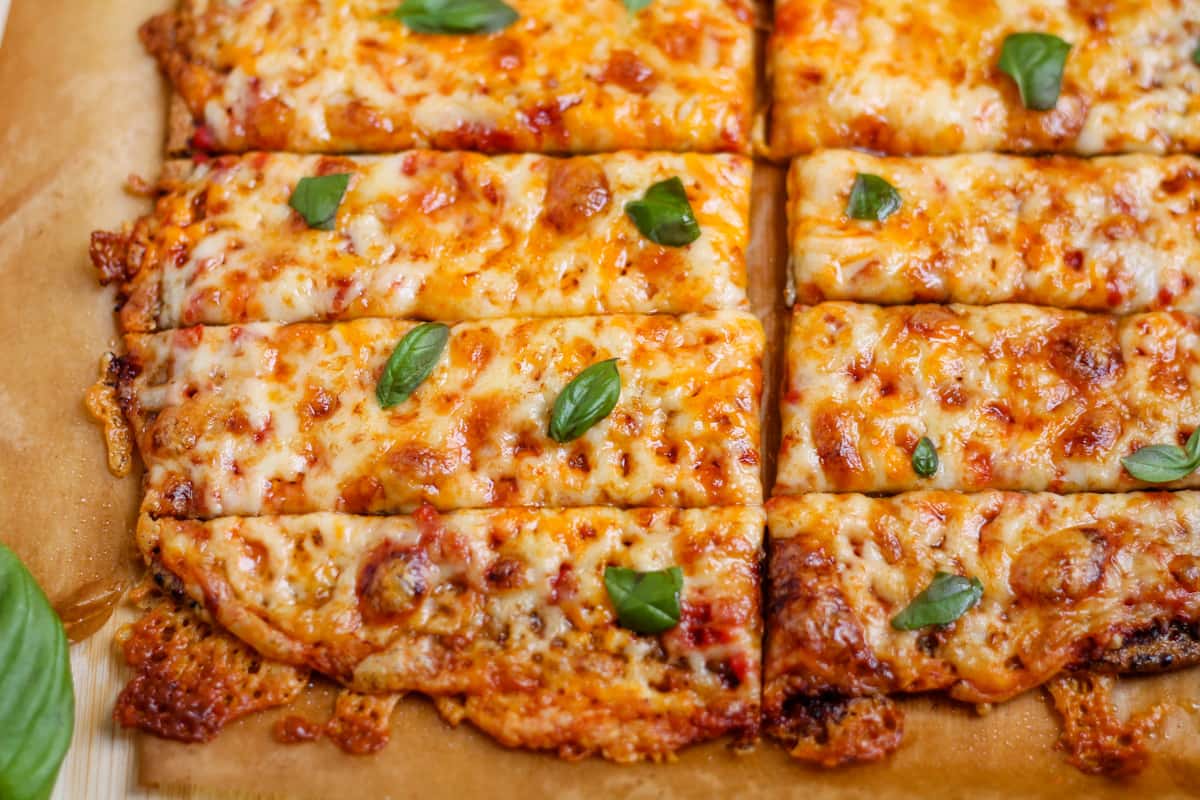
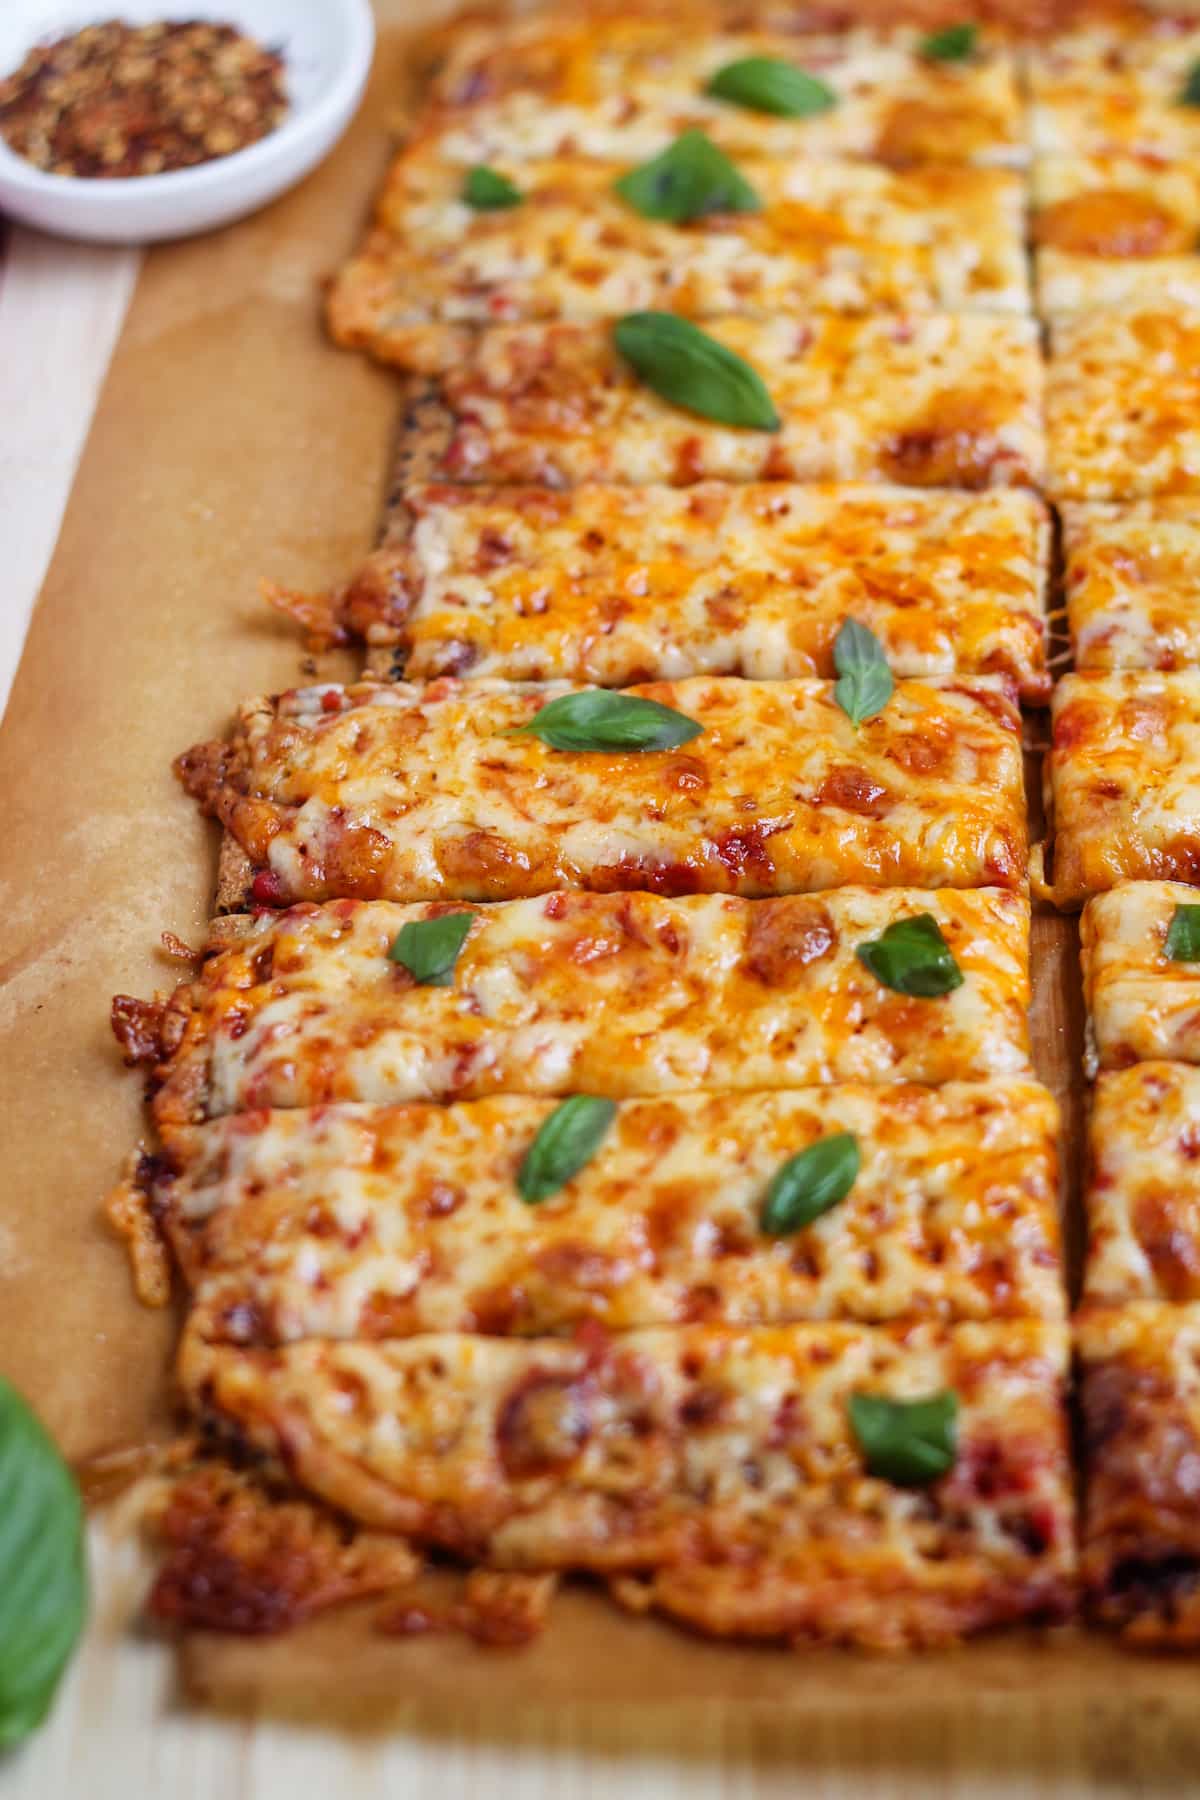
- Toppings – This is up to you. For the photos in this post, I used a bit of tomato sauce, marble cheese, and fresh basil. Dee-lish.

- Regenerative organic certified.
- Good source of fiber.
- Easy to cook.
Equipment
A few key pieces of equipment are needed for this recipe.
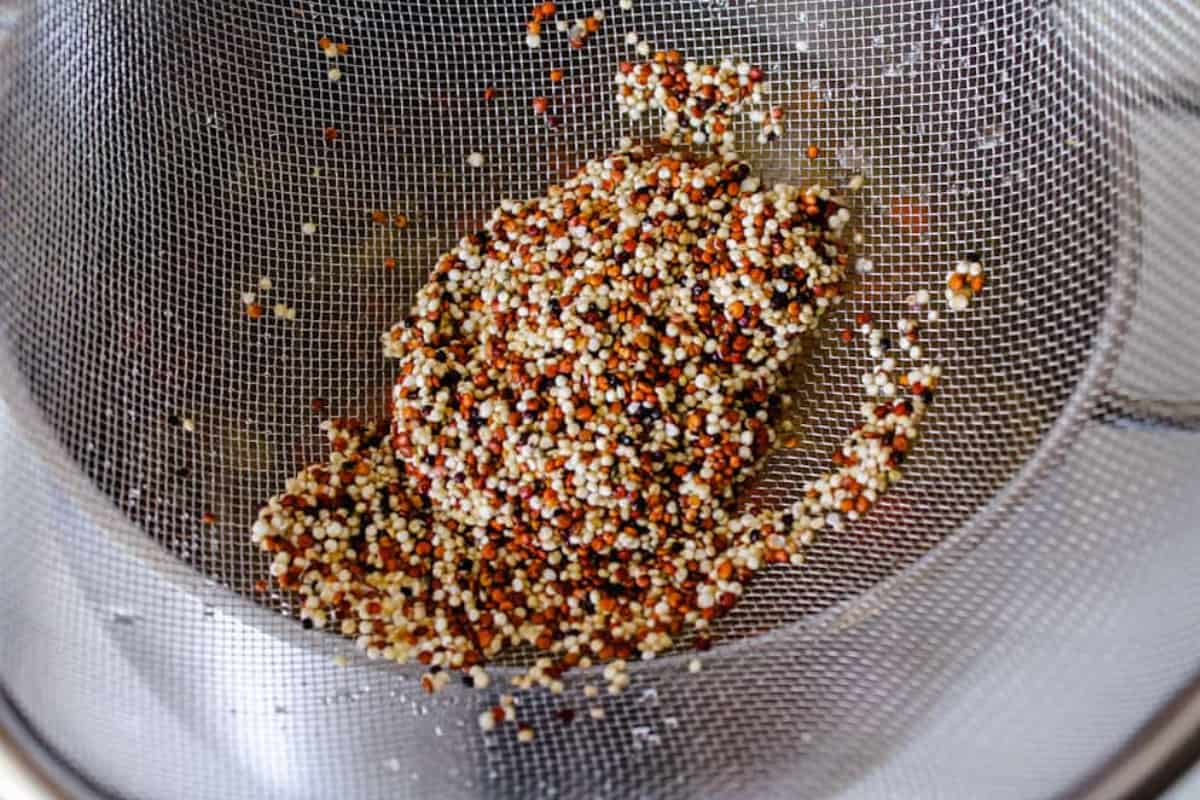
- Mesh Sieve – This recipe requires your quinoa to be rinsed really well. To accomplish this, we use a fine-mesh sieve to rinse.
- Covered Bowl or Container – Another important step is soaking the quinoa overnight. We use a glass food storage container with an airtight lid to store it in the fridge.
- Food Processor – We will need to process the soaked quinoa into a thick yet pourable batter. A food processor is the best tool for this. You could also use a high-powered blender, such as a Vitamix, if you have one. I’m still waiting for Santa to bring mine. 😉
- Baking Pan or Baking Sheet – We use a 9×13 baking pan for this recipe, but a cookie sheet would also work.

- Provides five processing functions and includes a stainless steel slicing/shredding disc and a chopping/pureeing blade.
- The generous 10-cup bowl fits large volumes of food all at once.
Instructions
Scroll to the recipe card at the bottom for the FULL recipe details.
Step 1
Firstly, rinse your raw quinoa thoroughly and transfer it to a bowl.
Cover the rinsed quinoa with an inch of water, cover the bowl, and pop it in the fridge. This needs to soak overnight.
Expert Tip!
Soaking the quinoa helps to soften it, allowing it to blend smoothly. Since we aren’t cooking it first, soaking is an essential step.
Step 2
Once the quinoa has been soaked for a minimum of 4 hours, we get started on making our flatbread.
Start by preheating the oven.
Then, drain the water from your soaked quinoa and rinse it very thoroughly. That fine-mesh sieve comes in handy once again.
Step 3
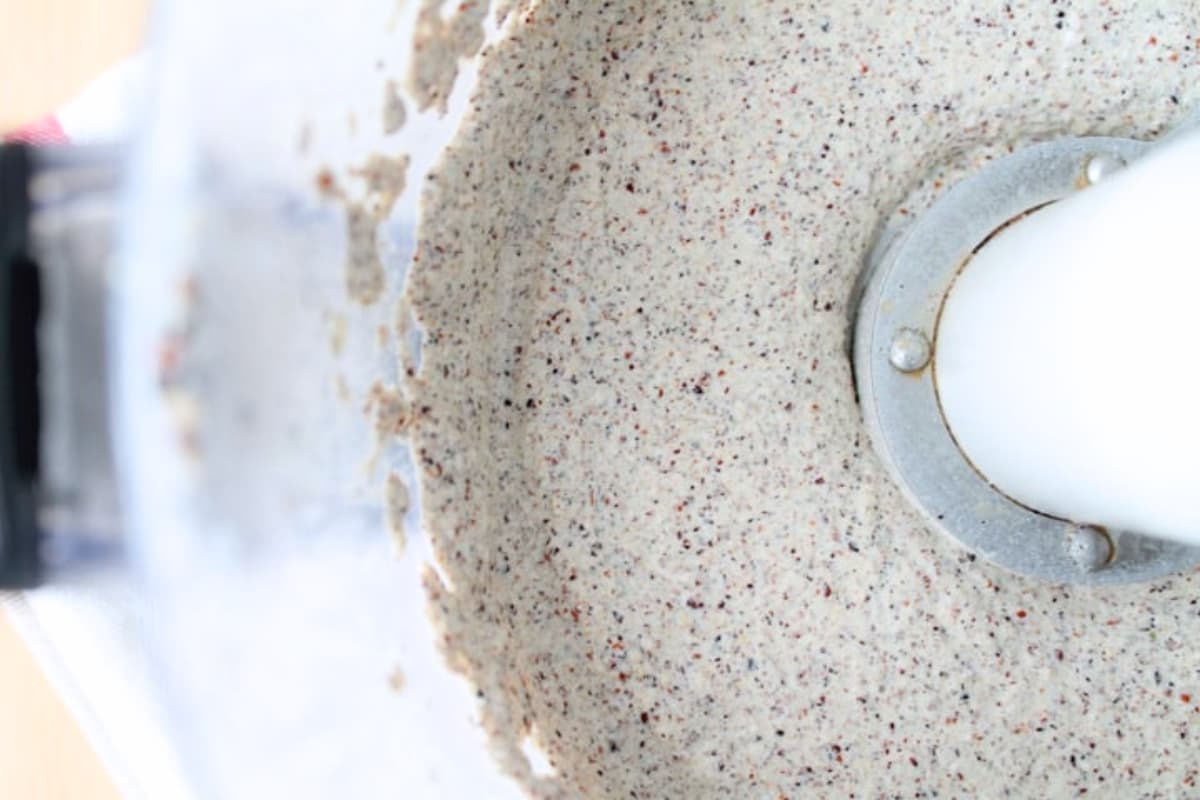
Next, transfer the rinsed quinoa to your food processor along with the garlic, water, salt, and baking powder.
Process until the mixture is smooth. This takes about 2 minutes.
The batter is smooth and pourable. It almost looks like a thick milkshake!
Step 4
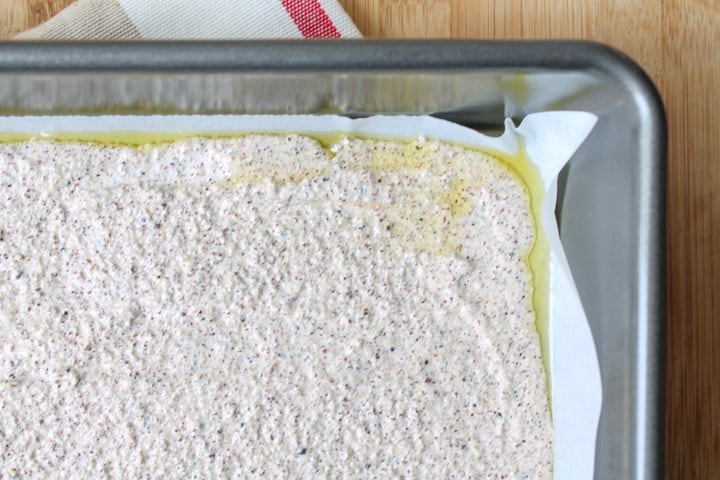
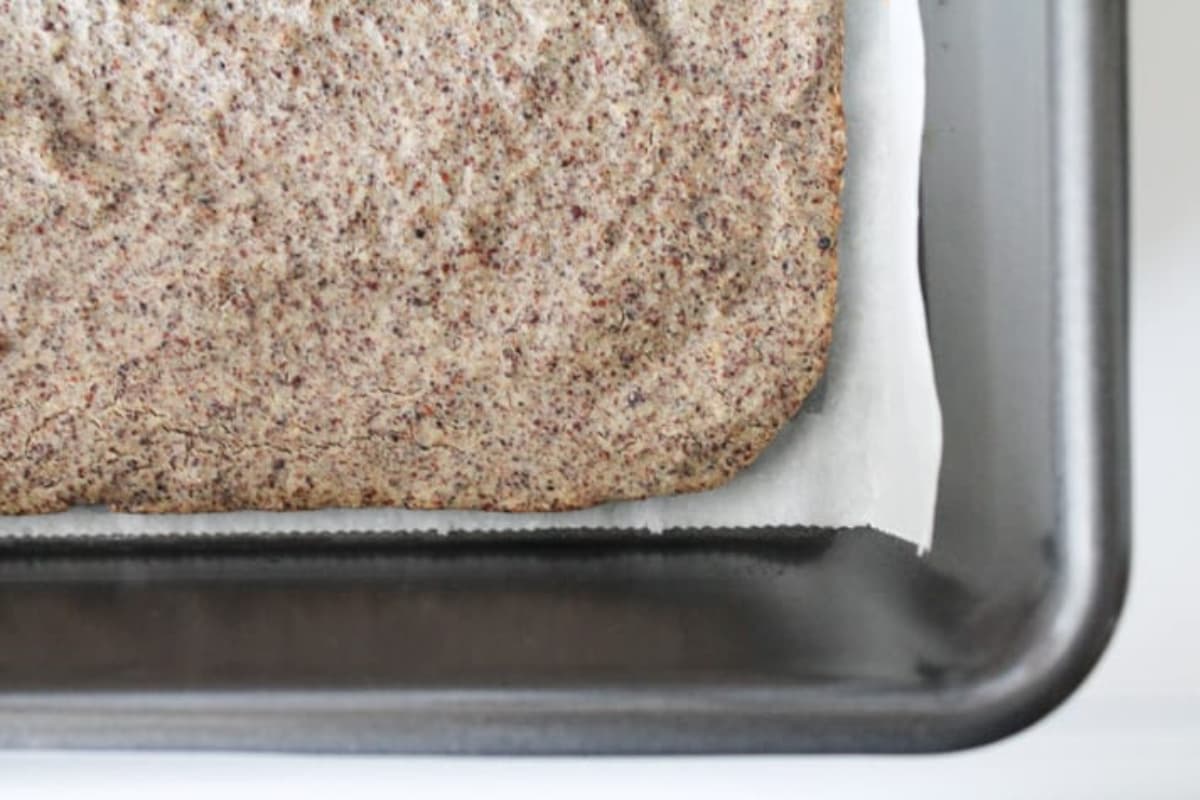
Then, prepare the pan. Brush one teaspoon of oil on the bottom of the baking pan and line it with parchment paper. Brush the remaining oil on top of the parchment paper.
Expert Tip!
Brushing oil on the bottom of the pan before lining it with parchment helps to stop the paper from sliding around when you pour the batter in.
Step 5
Next, pour the batter from the food processor into the pan. Use a spatula to spread it out evenly.
Step 5
Bake for 15 minutes, then flip over and bake for an additional 5 minutes.
When it comes time to flip the crust, you will be amazed at how it looks. Quinoa turns into ‘bready’, crusty goodness right before your eyes.
Step 6
Finally, add your toppings and broil for 3-4 minutes until the cheese is browned and bubbling.
Take the flatbread out of the oven and transfer it to a cutting board to cut into slices. Then try not to eat it all yourself!

Serving suggestions
My favorite way to serve this quinoa crust pizza is sliced into pieces and presented on the cutting board for everyone to dig into.
Drizzle it with balsamic glaze for a sweet touch that looks fancy af.
Dip it in some homemade ranch for an authentic restaurant vibe.
FAQS
No, it doesn’t. Soaking the quinoa for a minimum of 4 hours up to overnight softens it up enough that we don’t need to cook it at all.
The flatbread has a fairly neutral, slightly nutty flavor. The quinoa crust bakes up crispy and is perfect for a pizza base, letting the toppings shine.
Storage tips
Wrap the cooled flatbread in parchment, then place it in an airtight container. Store the leftovers in the fridge for up to 3 days.
To reheat the quinoa pizza crust, place the pieces into a lined baking pan. Preheat the oven to 350°F and warm them in the oven for 5-10 minutes.
More quinoa recipes
**This recipe was originally posted on May 26, 2014, and updated on July 22, 2025.**
Lightly adapted from Oatmeal with a Fork.
If you’ve tried this quinoa pizza crust, please give me a rating and let me know how it turned out by leaving me a comment below. I’m always interested in feedback!
Be sure to follow me on social media! I love pinning to Pinterest, sharing on Facebook, and posting pics on Instagram. See you there. 🙂
As an Amazon Associate, I earn from qualifying purchases.
Want to Save This Recipe?
Just enter your email and get it sent to your inbox! Plus you’ll get new recipes from us every week.
By submitting this form, you consent to receive emails from The Honour System

Quinoa Crust Flatbread
Ingredients
FOR THE CRUST
- ¾ cup quinoa
- ¼ cup water
- ½ tsp sea salt
- 1 tsp baking powder
- 1 clove garlic
TOPPING IDEAS
- tomato sauce, cheese, fresh basil *pictured
Instructions
- Rinse the quinoa thoroughly (at least 2 minutes) and then transfer it to a bowl.
- Cover the rinsed quinoa with an inch of water, and cover the bowl. Place the bowl in the fridge and soak the quinoa overnight, or a minimum of 4 hours.
- When you're ready to start, preheat the oven to 425°.
- Drain the water from your soaked quinoa and rinse thoroughly.
- Transfer the soaked and rinsed quinoa to your food processor along with the water, salt, baking powder, and garlic.
- Process for about two minutes until the mixture is smooth.
- Brush one teaspoon of oil on the bottom of a 9×13 baking pan and line it with parchment paper. Brush the remaining oil on top of the parchment paper
- Pour the batter into the pan and use a spatula to spread it out evenly.
- Bake for 15 minutes, then flip over and bake for an additional 5 minutes.
- Remove from the oven and set it to broil. Add your toppings and broil for 2-4 minutes until the cheese is browned and bubbling.
- Remove from the oven and cut into slices.
Could you just use quinoa flour instead and add in the water and baking powder?
I haven’t tested it that way so I can’t for sure say yes. It would be an experiment! Let me know if you try it, Rachael. 🙂
Tried this several times…….however mine always cracks up. Also I find that I can’t flip it over in order to bake it both sides. What am I doing wrong?
Hmmm … I can’t say I’ve had that issue. I would say to try baking it a little longer before flipping so it is sturdier. Maybe your oven runs cooler than mine and the flatbread could use a more cooking time? Hopefully that helps. 🙂
Is this super crunchy or mire bread like?
Hey Bari! In a 9×13 pan it’s crispy, yet still bready in the middle. If you used a smaller pan it would definitely be breadier.
Quinoa crust? What a great idea! I’m not a huge fan of cauliflower crust to be honest, but this sounds a little more up my alley, I’ll have to try it out 🙂
It’s too easy not to! You will love it for sure. Welcome back! 🙂
Ahhhh this is why I LOVE your blog! Just when I need something new in my life, BAM Sharon adds it! I have to say, I’ve never tried cauliflower crust because it seems so time consuming lol but this, I can do! And will do! 🙂
Thanks Karen! So nice, I’m blushing. 🙂 This recipe is indeed easy and I know you’ll love it. I’m looking forward to making a BBQ chicken version!
I love this! This flat great looks AMAZING! I need to try ASAP. I’ve seen quinoa flour before so I figured you could use it to make bread stuff, but have yet to give it a try. Pinning!
We really loved this. I’m looking forward to trying out a bunch of different varieties. 🙂 I hope you love it, too!
Love this really cool technique with the quinoa! So simple and looks insanely delicious! You’ve done it again, my friend! 😀
Well, Lauren deserves the praise, but yes, so simple and delicious! I hope you give it a go! 🙂
… Hi Sharon … looks AAAMMMAZING … very soon you will get a report … thanks a ton … God Bless you Sharon …
I’m looking forward to hearing about it! Thanks Dina! 🙂
Haha I am too lazy for cauliflower crust too. 🙂 This looks like a great alternative, I will have to try it soon!
You won’t be disappointed June. Super easy, delicious and so adaptable as far as the toppings. Have a great week! 🙂