Homemade Twix Bars
This Homemade Twix Bar Recipe is the best healthy version of the store-bought treat. These copycat Twix bars are vegan and gluten-free, which makes them easy for everyone to enjoy. They are made with a delicious date caramel and a quinoa/coconut flour cookie crust.
Twix bars were one of my all-time faves growing up.
The best thing about them was that there were two!
One went in the fridge for later and the other, directly into my mouth. 🙂 Did you ever ask yourself which is better, the left twix or the right twix? My personal opinion is the left is the BEST. haha
This month, a recipe for Crunch Bars that I posted for the Food Revolution Day in Burlington was featured on a list of Homemade Halloween Treats on Greatist.com.
It was actually what inspired me to compile my own list!
One of the recipes that jumped out at me was this one for Twix bars.
Sold!
HOW TO MAKE HOMEMADE TWIX BARS:
I’m jumping at the chance to use my sparkling new quinoa flour, so I used it for the cookie portion of the Twix.
I blended it in with some coconut flour, peanut butter, coconut oil, and a touch of sugar.
To keep it vegan I used a flax egg.
I just got down and dirty with my hands to mix this dough.
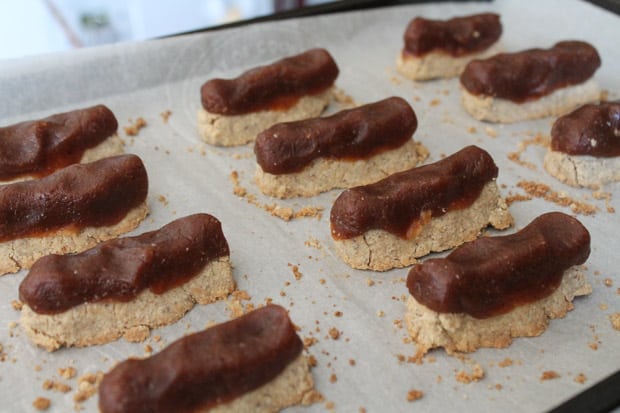
It was crumbly but held together to form a big ball which I then portioned out by breaking it in halves until I had 12 pieces.
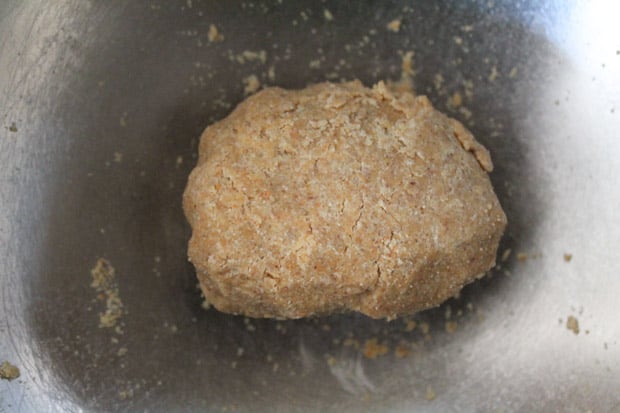
I formed each piece into the rectangle shape of a Twix on a parchment-lined baking sheet.
I didn’t get too fussy with them other than flattening them down with the side of a butter knife. These were baked for about 12 minutes, then left too cool on the pan.
They cracked on top but did not crumble when I handled them.

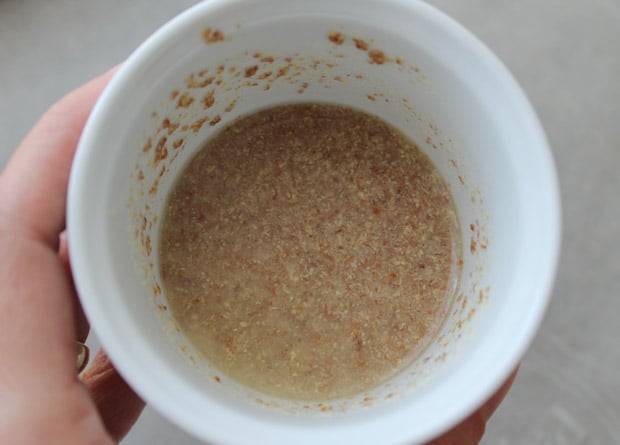
Meanwhile, I made the caramel layer.
Using dates, otherwise known as nature’s candy, (totally stole that one from Joe. It’s what he calls raspberries) as the base of this caramel, I simply processed it along with some peanut butter and a pinch of sea salt.
Boom!
Natural caramel goodness. 🙂
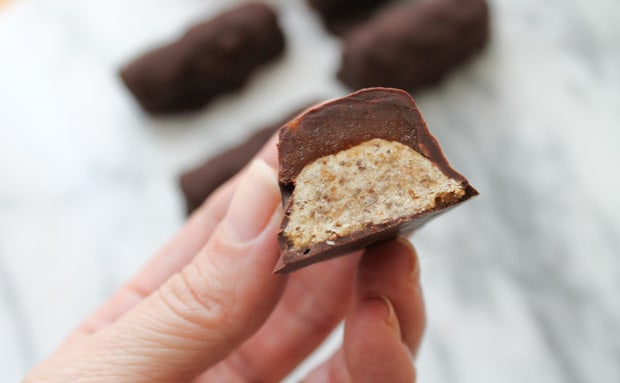
Using the same trick I used with the dough, I broke down the ball of date caramel into 12 pieces, then rolled them lengthwise and smooshed them on top of the cookie bases.
They were really starting to look like Twix bars! Off to the freezer they went.
Next, I melted some dark chocolate and a bit of coconut oil over low heat until very liquid.
Now it was time to cover the bars with the chocolate mixture.
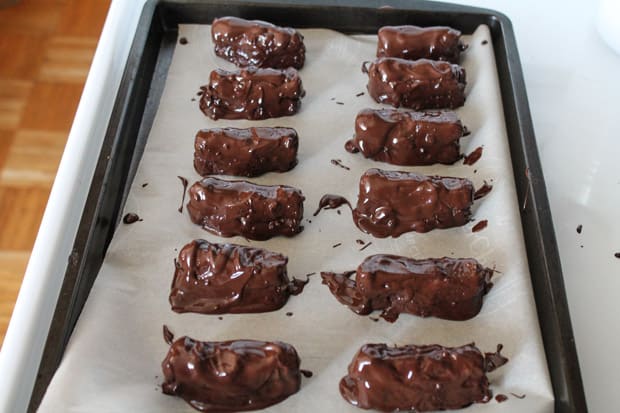
Back into the freezer to set.
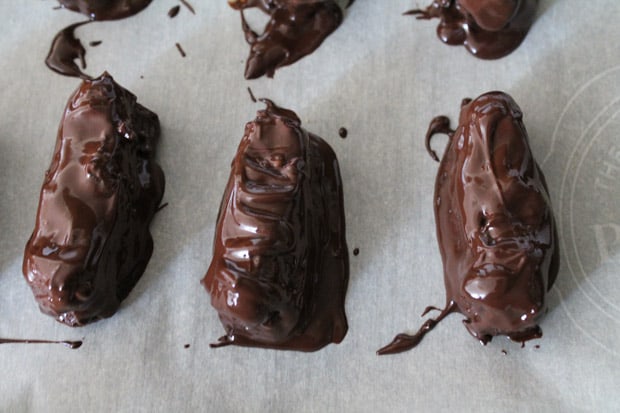
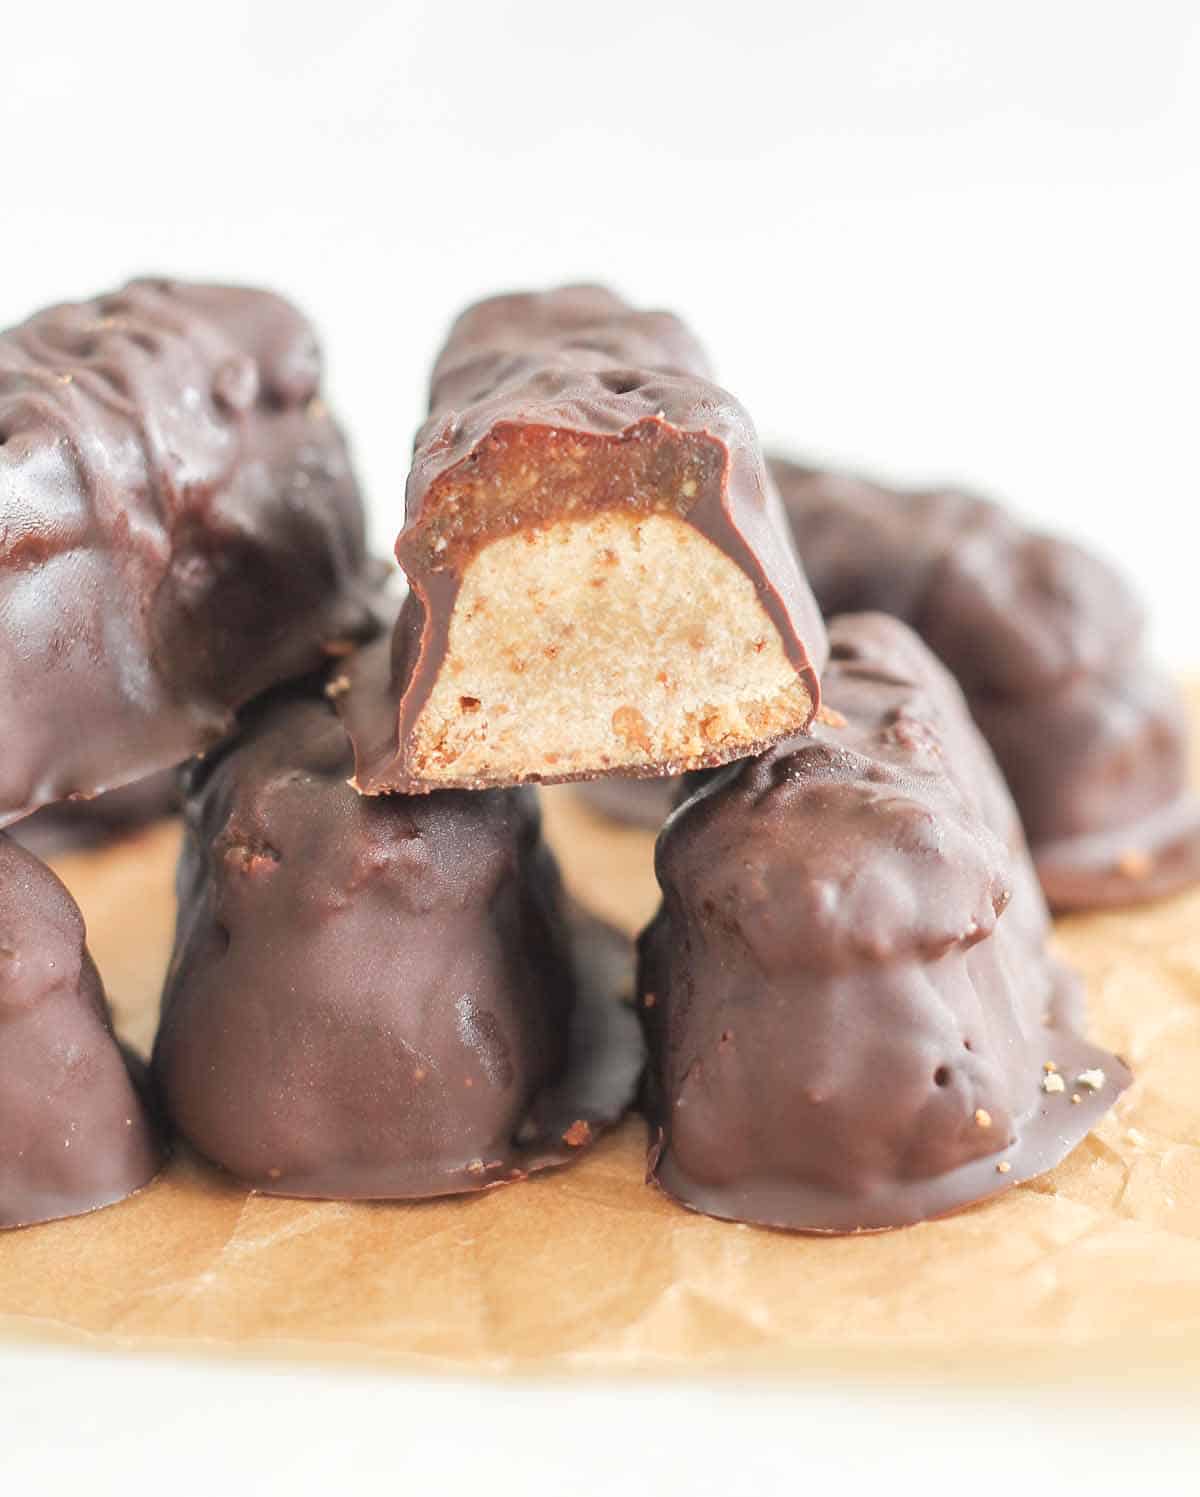
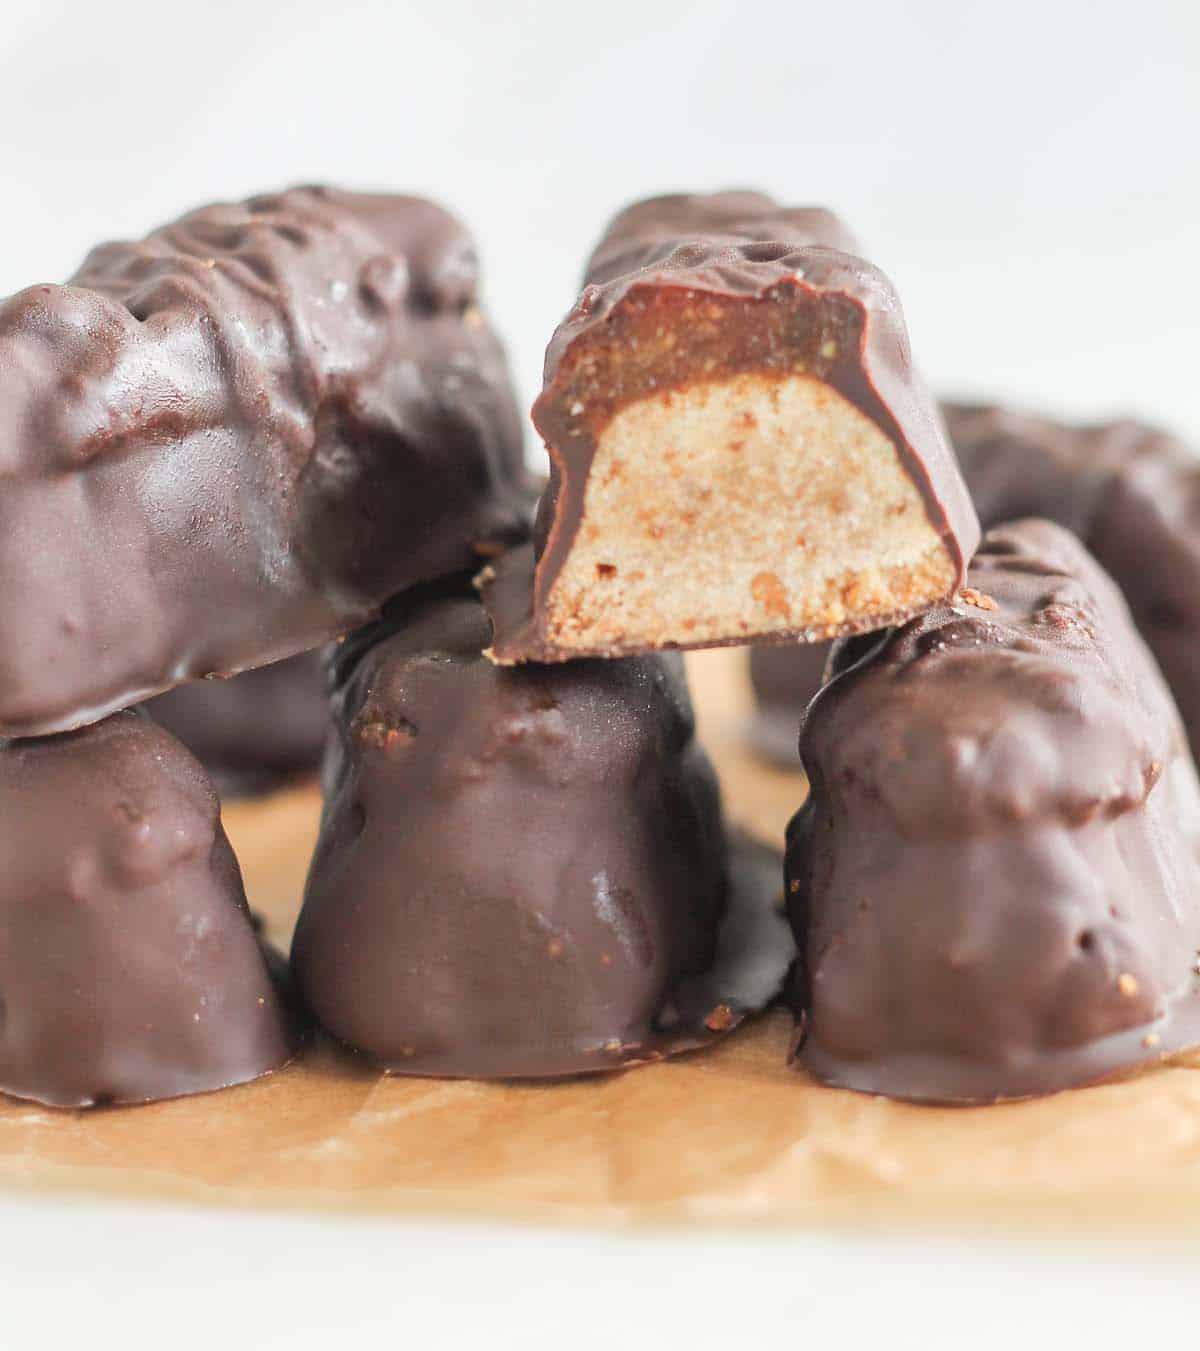
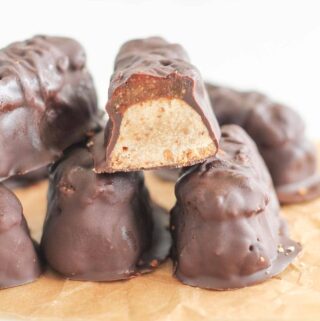
The verdict was two thumbs up.
Nice cookie crunch and the date caramel was a smooth and chewy consistency.
I cut them in half and packed them up for work to share in exchange for tricks!
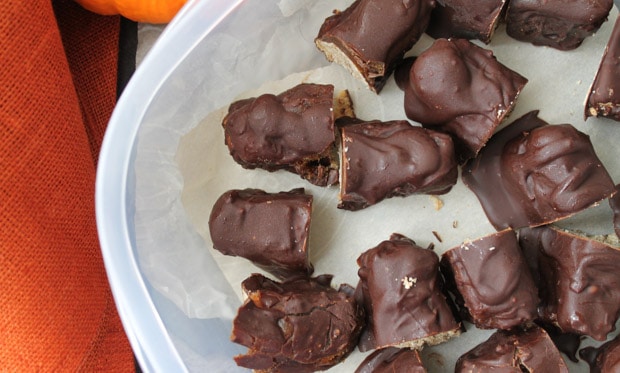
I wish they looked better because these are so tasty.
Not quite as uniform looking as the manufactured brand but all-natural ingredients make them beautiful on the inside. 😉
Enjoy!
MORE HEALTHY HALLOWEEN TREATS:
Originally posted on October 30, 2013. Updated October 8, 2020
Be sure to follow me on social media! I love pinning to Pinterest, sharing on Facebook and posting pics to Instagram. See you there. 🙂
As an Amazon Associate, I earn from qualifying purchases.
Want to Save This Recipe?
Just enter your email and get it sent to your inbox! Plus you’ll get new recipes from us every week.
By submitting this form, you consent to receive emails from The Honour System
Homemade Twix Bars
Ingredients
- For the Cookie Base:
- 1/2 cup quinoa flour
- 1/2 cup coconut flour
- 2 tbsp coconut sugar
- 3 tbsp peanut butter
- 2 tbsp virgin coconut oil
- 1 flax egg 1 tbsp ground flax mixed with 2 tbsp water allowed to sit for 5 minutes
- 1 tbsp vanilla
- For the Caramel Layer:
- 6 dates
- 3 tbsp peanut butter
- 1 tsp water
- pinch sea salt
- For the Chocolate Coating:
- 3/4 cup dark chocolate chips
- 1 tbsp coconut oil
Instructions
- Preheat oven to 350, line a baking sheet with parchment paper and set aside.
- In a medium mixing bowl, whisk together the flours and coconut sugar until combined. Then with your hands blend in the peanut butter, coconut oil, flax egg and vanilla until fully combined. The dough should form a ball. If it is too dry, add more coconut oil.
- Break the ball of dough in halves until you have 12 even pieces. Shape them into bars on your parchment lined sheet.
- Place bars in the oven for 12-15 minutes until tops are slightly cracked and sides are golden then set aside to cool on the pan.
- Meanwhile, place caramel ingredients in the bowl of your food processor then process until smooth adding more water if the mixture needs thinning out.
- Top the cookie bars with caramel by using the same method of breaking the ball of caramel into halves until you have 12 pieces and smooshing them on top of the cookie bars.
- Pop the tray into the freezer and allow to set for at least 10 minutes. This will make the cookies easier to dip in the chocolate. Melt chocolate chips and coconut oil together over low heat, stirring frequently.
- Once the chocolate has melted, one by one, coat the bars by placing them in the pan, and using a fork turn them over to coat them in the chocolate. Transfer to a parchment lined baking sheet then pop back into the freezer for 15 minutes.
- I cut these in half and stored them in the freezer in a sealed container. They will keep for up to a week.
Hello, I am allergic to nuts. Do you think sunflower seed butter would work for the caramel?
It would work for sure! The flavor would be a little different but still delicious.
I would take this healthy yummy version over the real one any day! It is fantastic and my daughter loves it too!
I agree! I can’t go back to the store bought stuff. 🙂 Thanks Kristen!
OMG Sharon – this is like a dream come true! Like you, this was my fave chocolate bar growing up AND it’s what my kids’ always save me from their Halloween goody bags because they know how much I adore them. I had no idea you could make healthy Twix at home. I am sooo making these!
Homemade is always best!! And I’m happy to find a Twix sister. 🙂 I hope you enjoy them!!
Oh wow…these look amazing! They’re totally bringing back memories of my childhood/high school days! And I love how this looks totally doable! Thanks for sharing this recipe!
Totally doable!! And very eatable too. lol Thanks Lisa!
My husband loves Twix bars, and with Halloween coming up, I was looking for a healthier, homemade version. Love the wholesome ingredients you use in this recipe. Can’t wait to give it a try!
This is the version for you!! I hope the hubby enjoys. 🙂
Super Yumm!!! I could do with one right now!!
Lol!! I know what you mean!! I’ve had more than my share already. 😉
Great idea! i totally forgot about twix until now! thanks for sharing!
Omgsh they are my FAVE.
What a neat treat! I’ve actually never had a Twix bar but I would eat these. I love how you can control what goes into the bars…no weird ingredients or preservatives!
Never had a Twix?? What madness is this?! lol You must remedy that soon. 🙂
Oh wow! Love homemade candy instead of store-bought for Hallowe’en snacking at home! These are delicious!!
Homemade treats for the win!! They are worth the effort in the end, right? My philosophy is I can eat as many as I want – if I made it myself. 😉
I love these!!! Twix is bringing me back to being a kid. I never thought I could have them again until this gluten free, vegan and healthy version came along!! Can’t wait to make these😄
Right?! It’s brought me right back. 🙂 I hope you love these!
a suggestion for dipping would be to use a fork or fondue pick (the smaller the tines the better)..that way you get the entire bar covered (even the sides unless you are wanting to “sample” that chocolatey goodness), with a minimum of fuss. To eliminate messy transfers, let the excess chocolate drip back into the pot then place on cookie sheet.. Hope this helps!
LONG LIVE TWIX!!!
Great idea! That really was the only drawback of this recipe. Albeit a happy drawback … chocolate fingers. 😉 Thanks so much for sharing Deanna! 🙂
WOOOOOW!!! These look amazing! A really big thanks for posting this recipe because twix is my favorite chocolate bar and you’ve just made it a million times better! 😀
Thanks Steph! They are my favourite as well. 🙂 You are going to LOVE these.
They look delish! I’d love to make them, however, what would be a good substitute for the coconut flour?
Hi Martina! If you’re looking to keep it gluten free you could try an all purpose gluten free flour. If you’re not allergic to gluten any other flour should work.
Yep – totally agree with Monica! That homemade appearance promises so much more yumminess than the mass-produced look of store-bought! Great post!!!!
These were my favourite 🙂
They look great! From my experience, the homemade appearance makes them even tastier! Gives ’em some rustic charm 😉
Thanks Monica! I do believe you’re right 🙂 Happy Halloween!