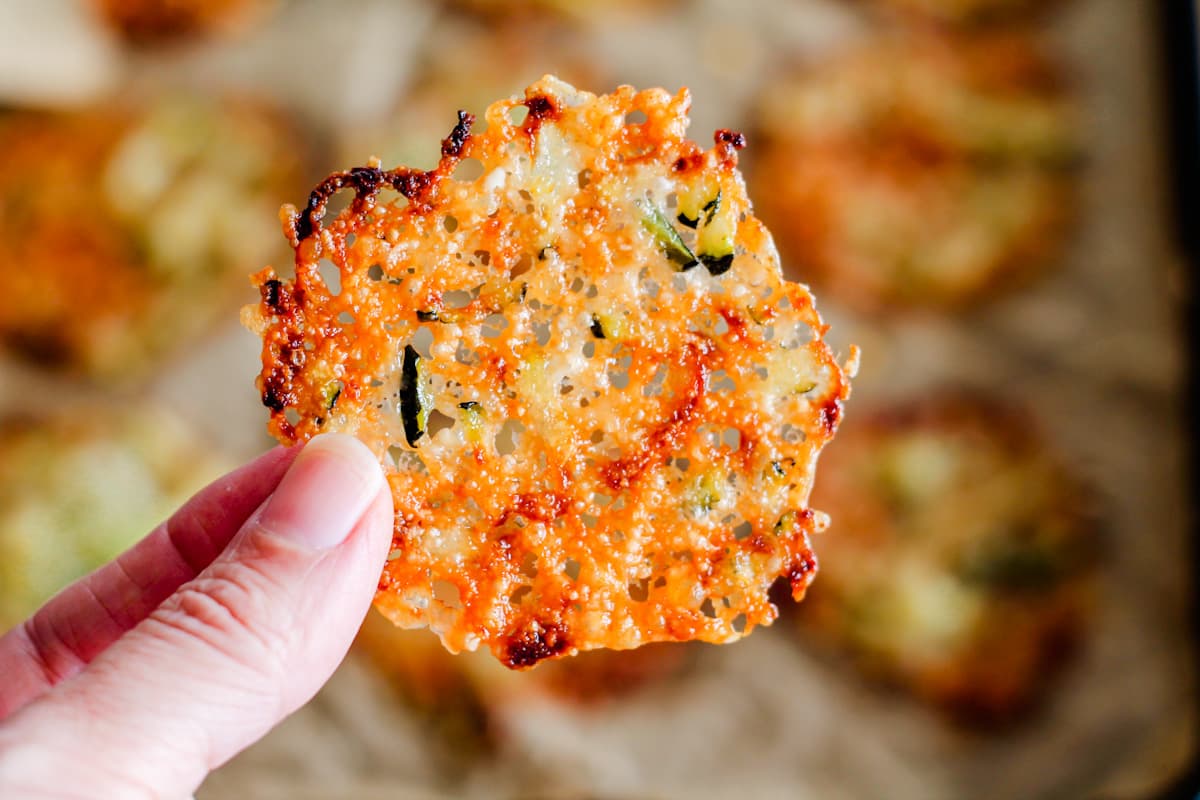
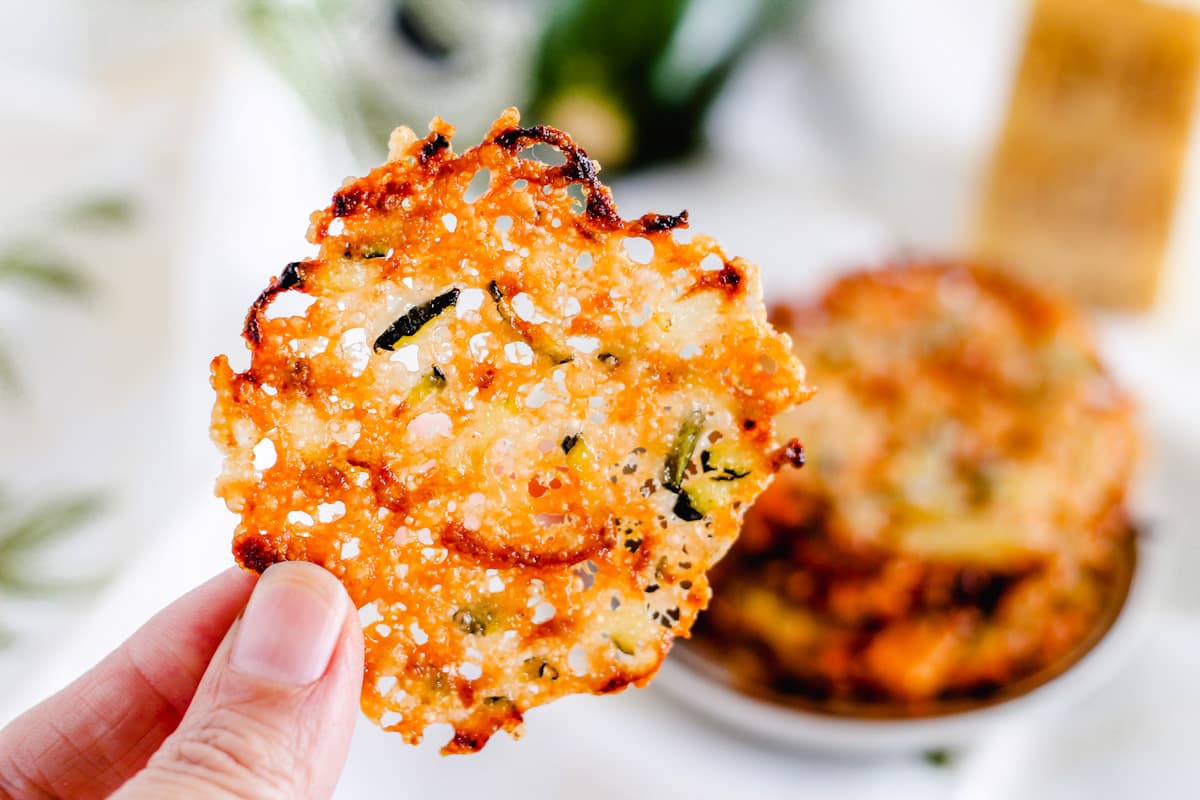
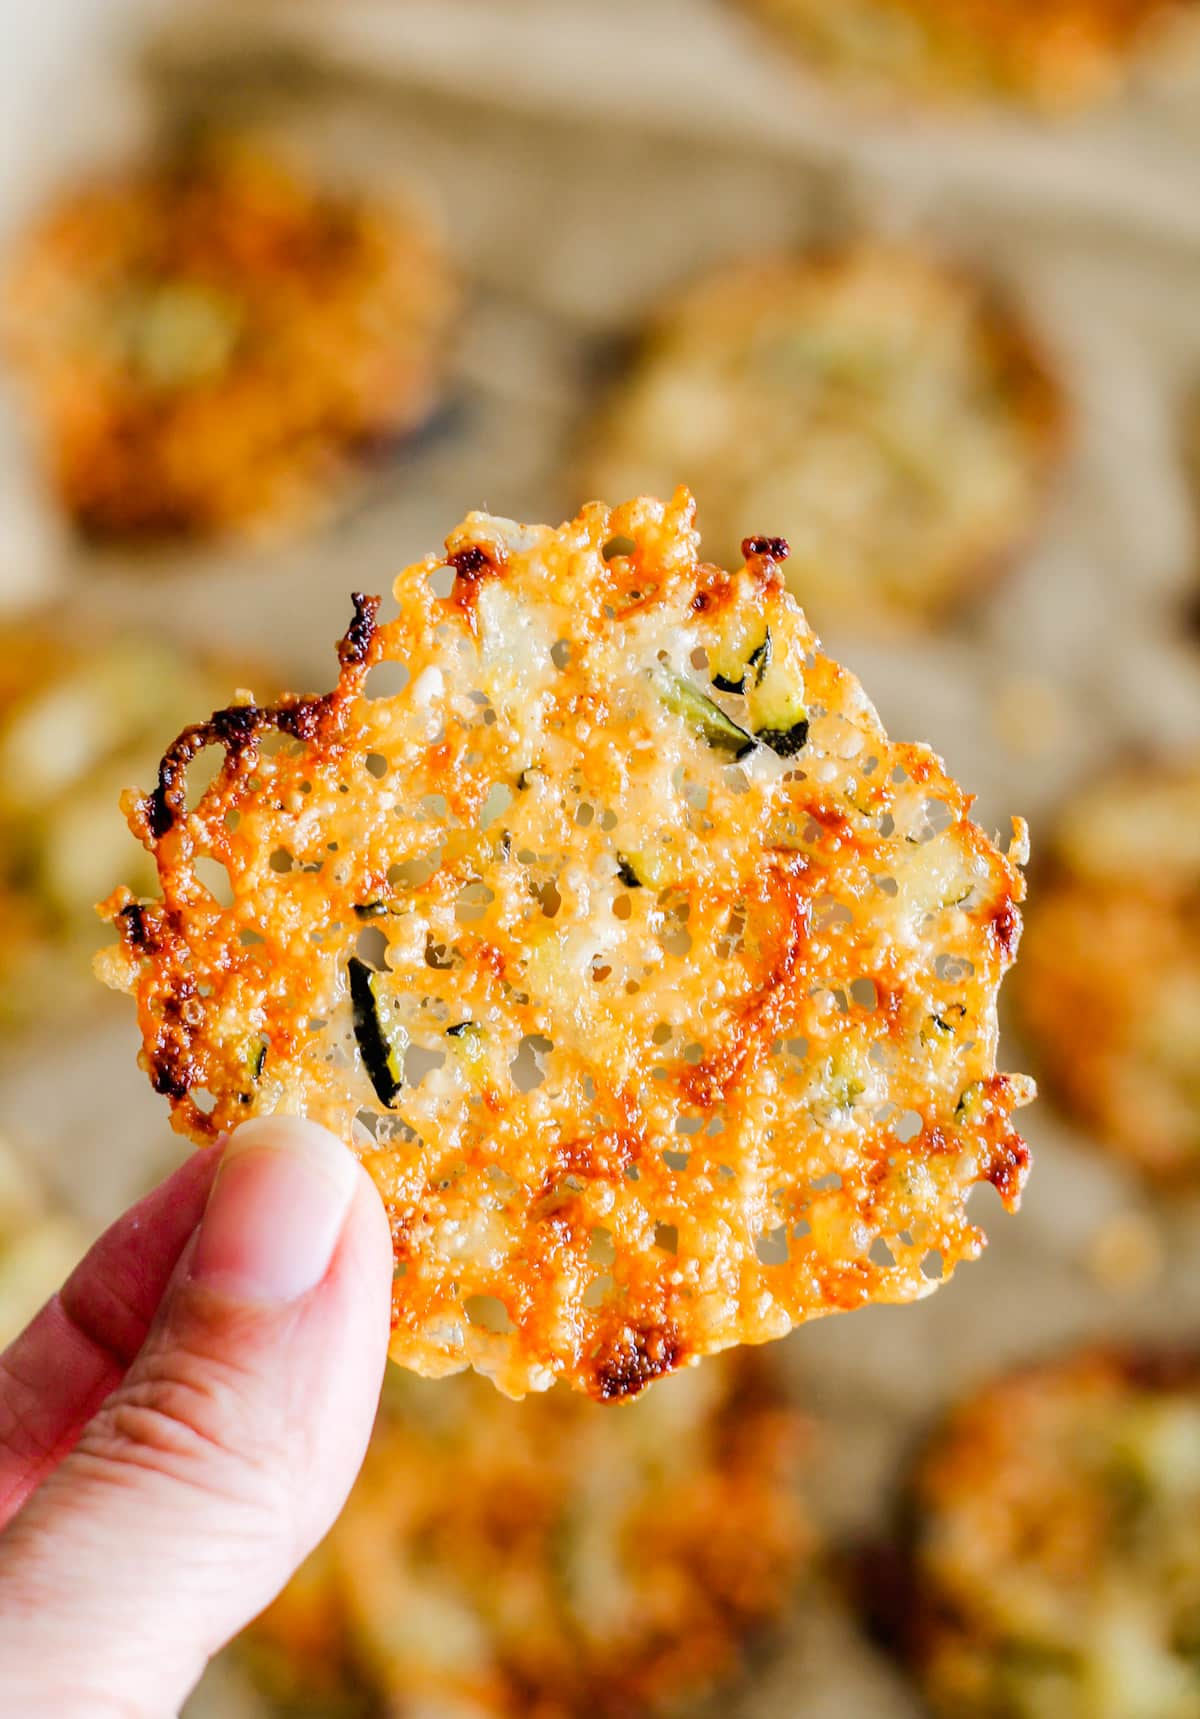
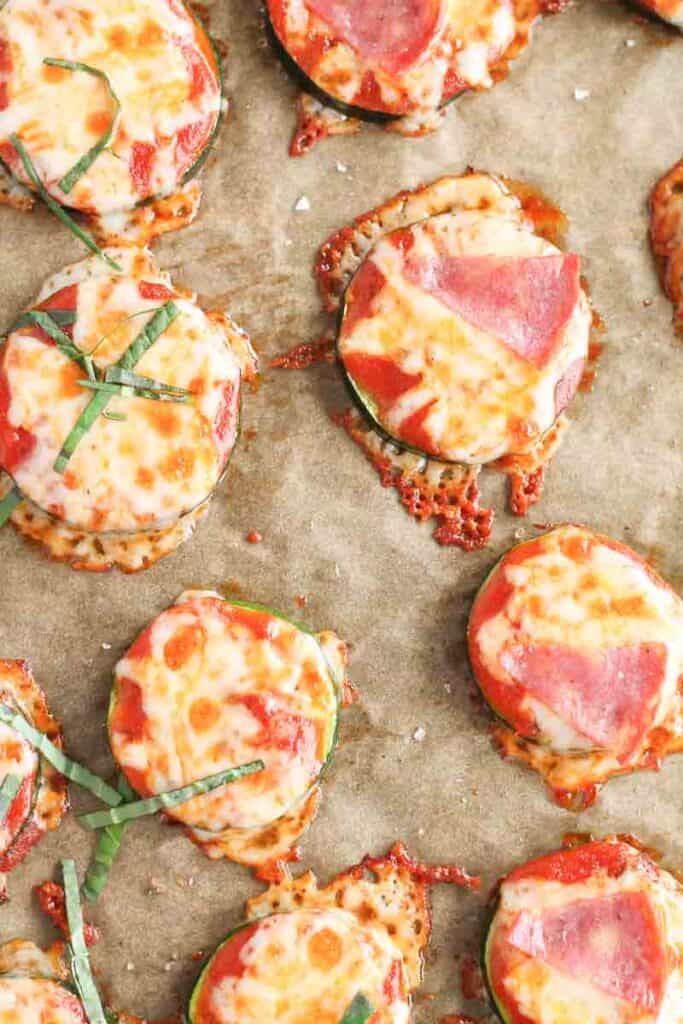
Zucchini Parmesan Crisps
These Zucchini Parmesan Crisps are a savory and healthy recipe that perfectly combines the natural goodness of zucchini with the richness of Parmesan cheese. Enjoy these flavorful crisps as a crunchy addition to salads and soups or a satisfying anytime snack!
As an Amazon Associate, I earn from qualifying purchases.
We love these Parmesan Zucchini Crisps as a substitute for potato chips when we are craving something with crunch. Other zucchini recipes we love include these delicious Zucchini noodles with chicken, these Mini Zucchini Pizzas, and these Roasted Zucchini Tuna Melts. Yum!
Why YOU will love this recipe
- Compared to traditional potato chips or deep-fried snacks, these crisps are a healthier alternative.
- This recipe is relatively simple and requires minimal preparation. It’s a quick and tasty way to use up excess zucchini during the peak harvest season.
- No flour, eggs, bread crumbs, or panko mixture is necessary – you only need two whole food ingredients for these yummy chips.
- These crisps are naturally low-carb, keto, and gluten-free. Bonus!
Ingredients
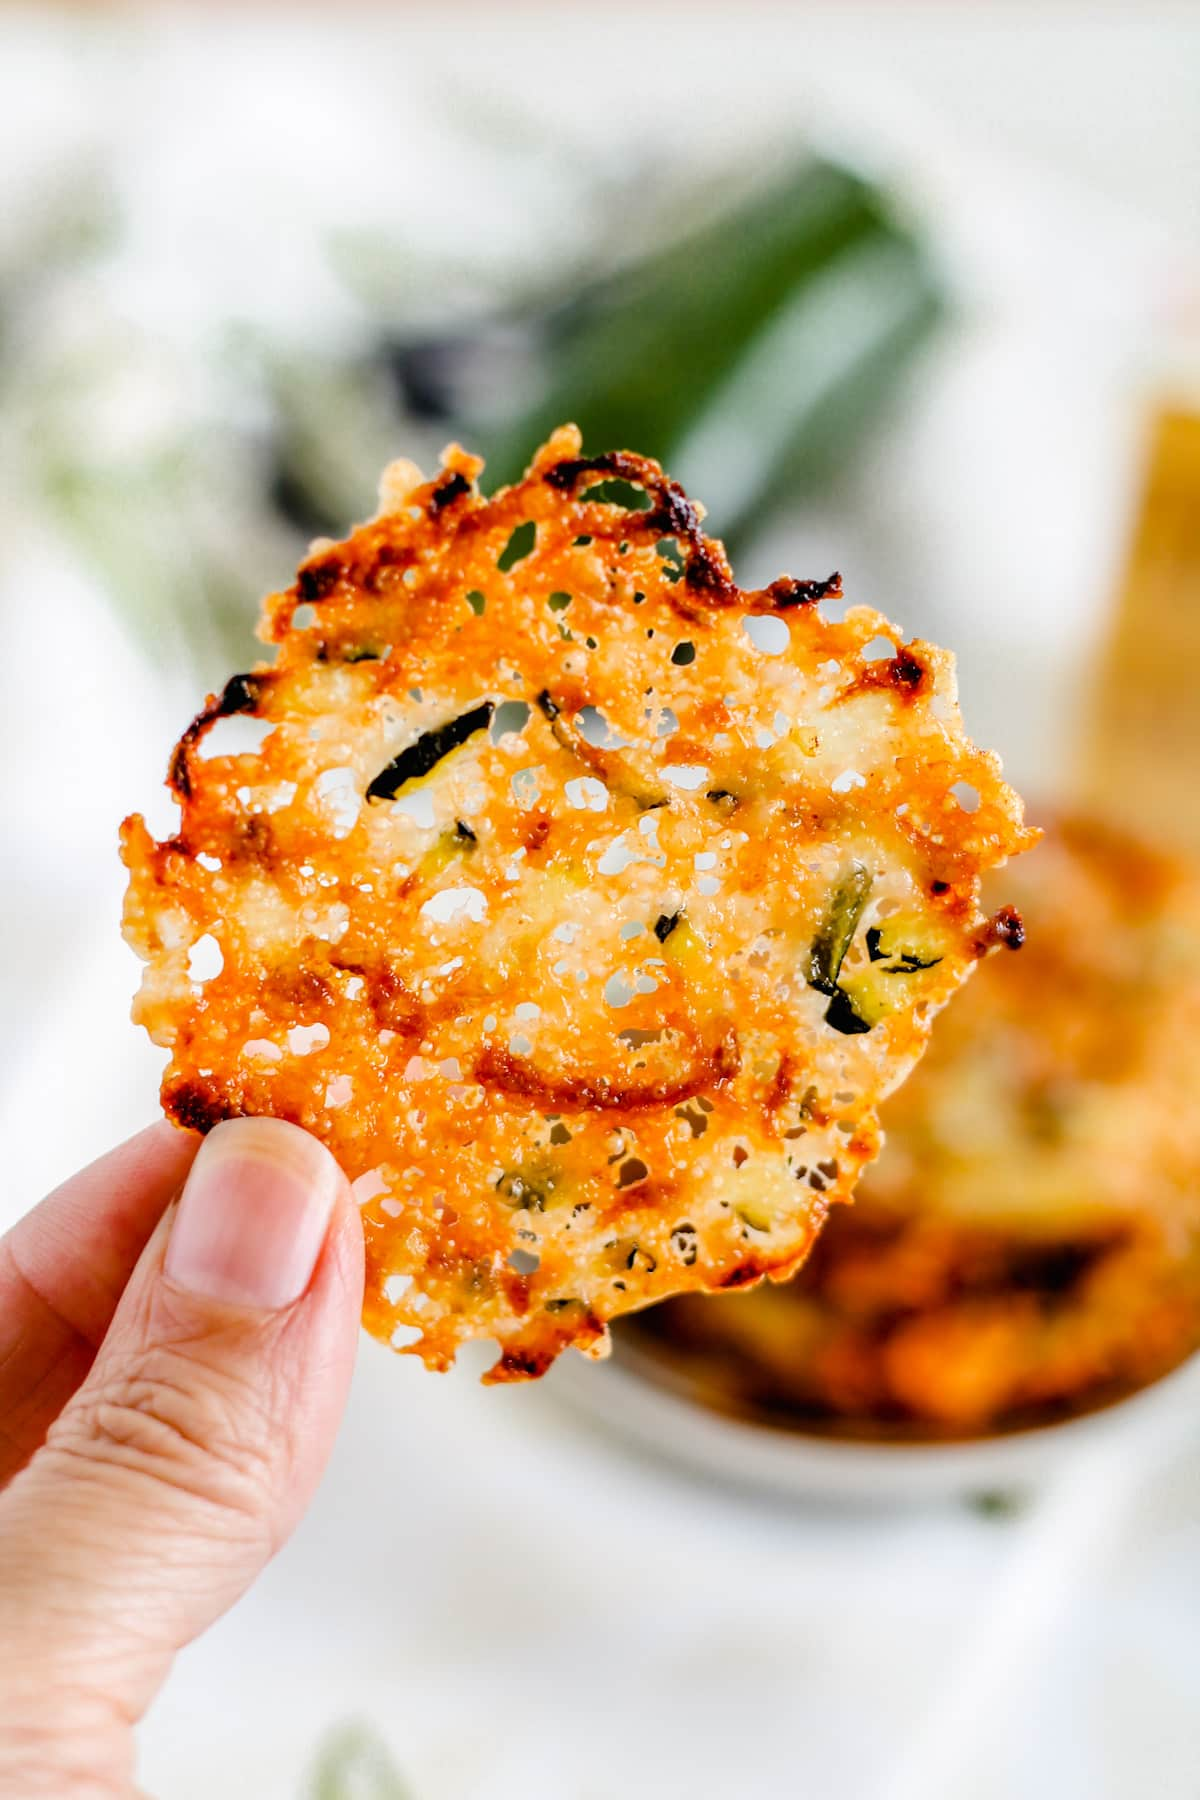
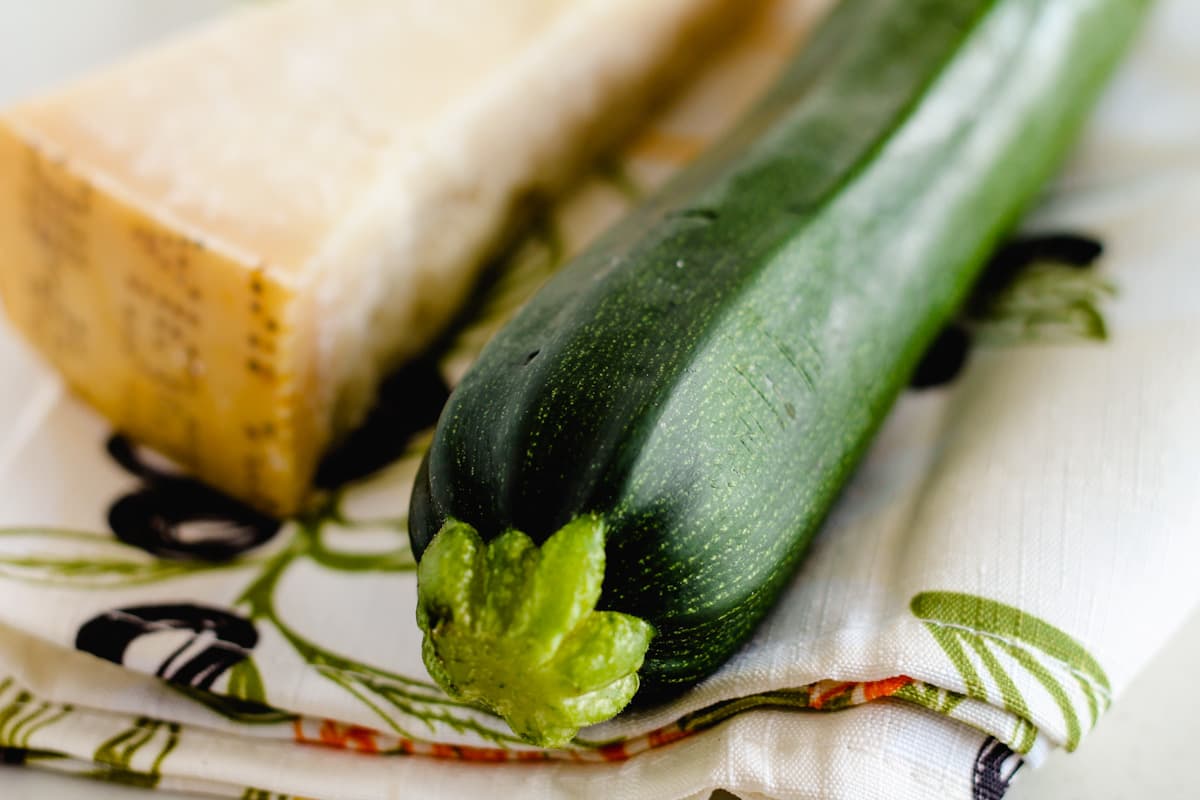
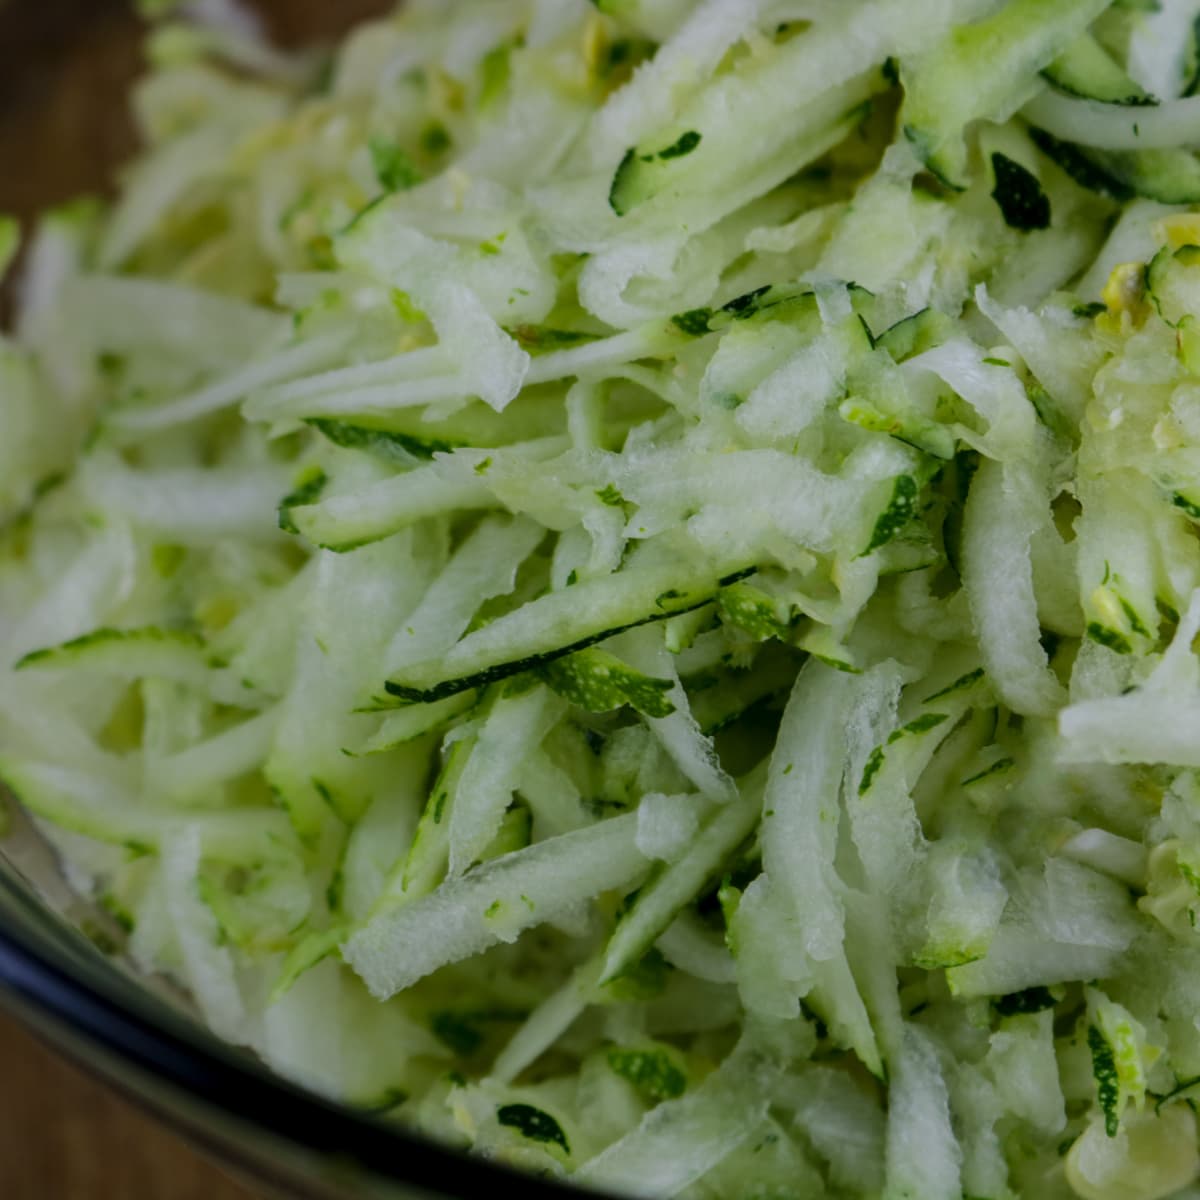
- zucchini – this will be shredded. Unlike the typical thick zucchini rounds or zucchini slices, these crisps are super thin and crunchy.
- parmesan cheese – this recipe requires the REAL stuff. Don’t use the fake cheese product in a canister as it won’t melt and crisp up the same as the authentic cheese.
Equipment
- box grater – use the larger holes for grating the zucchini and the medium ones for shredding the parmesan.
- paper towels or clean kitchen towels – you will use these to squeeze the moisture out of the zucchini.
- mixing bowl – for combining the ingredients.
- baking sheet – a rimmed baking sheet is best.
- parchment paper – this is a must for no sticking and for easy cleanup. We recommend using unbleached parchment paper.
Instructions
Scroll down to the recipe card at the bottom for the FULL recipe details.
Step 1
First, start by preheating the oven to 375 and lining the baking sheet with parchment paper.
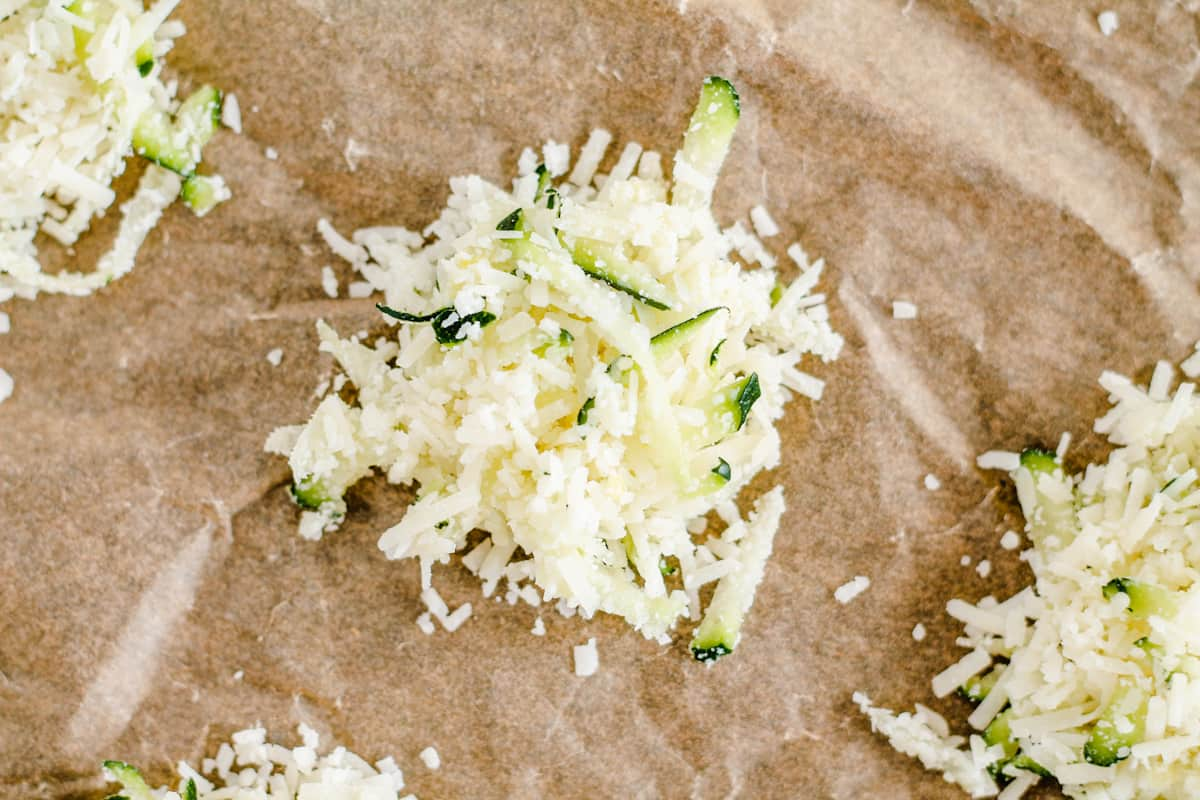
Then, get started on prepping the zucchini.
Zucchini has a lot of moisture in it and it needs to be pressed out. Lay a couple of layers of paper towels, or a clean kitchen towel on a cutting board and place the shredded zucchini on top of it, and press down firmly with your hands to squeeze out the liquid.
Step 2
Next, finely shred the parmesan cheese using the medium holes on a box grater.
Step 3
Then, in a large mixing bowl, combine the ingredients with your fingers, tossing them together.
Step 4
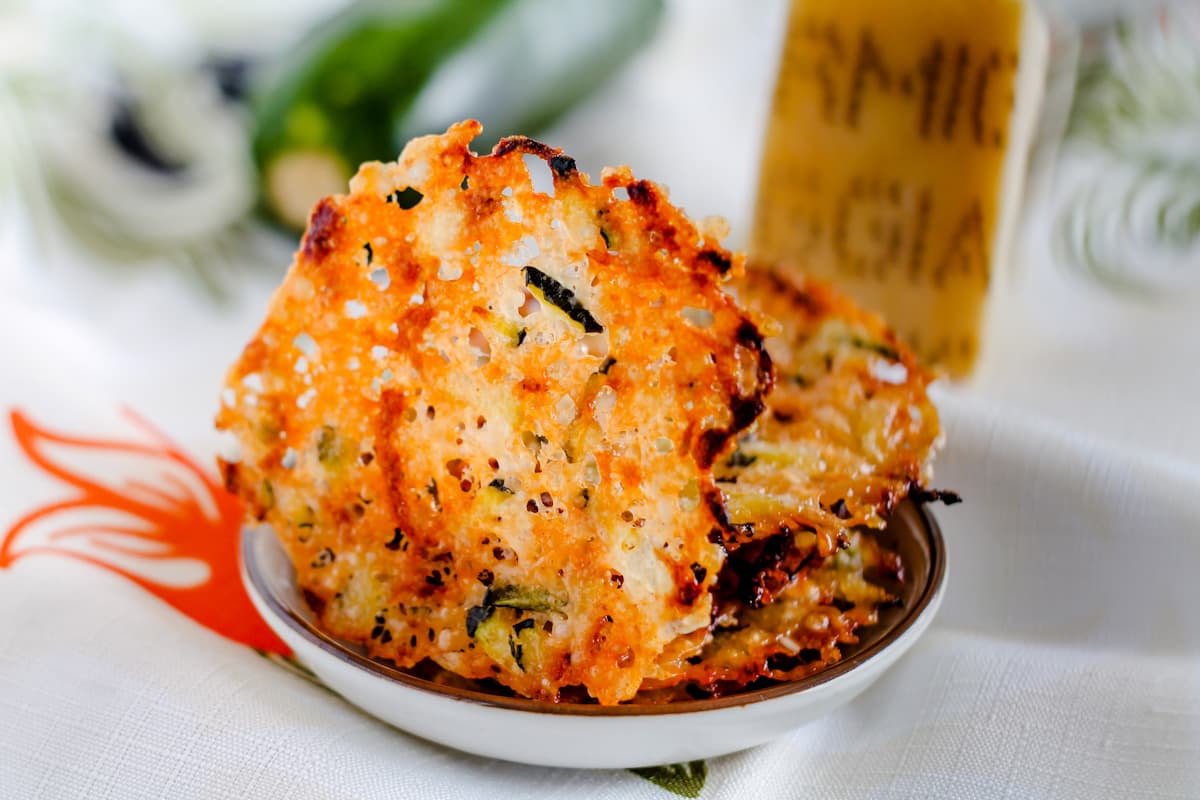
Next, transfer heaping tablespoons of the mixture to the prepared baking sheet in a single layer. Repeat until all of the cheese and zucchini mixture is gone.

Step 5
Place the baking sheet into the oven for about ten minutes. Keep an eye on them so they don’t burn! They don’t need much cooking time.
Watch for the crispy browned edges.
Let them cool for 5 minutes in the pan to finish crisping up. Waiting is the hardest part of this recipe!
Expert tip
Be sure to leave a bit of space between the zucchini and cheese piles on the baking sheet – don’t crowd them.
Leaving a little bit of room between them allows the heat to circulate better which will give you a nice crispy end product.
Recipe variations
- Consider adding seasonings like garlic powder or onion powder to lend a bold taste.
- Sprinkle in a bit of lemon zest to the mixture. The citrusy tang will brighten up the flavor and add a refreshing element to the crisps.
- Add a kick of heat by sprinkling in some chili powder, cayenne pepper, or crushed red pepper flakes into the mixture before baking.
Serving suggestions
- Enjoy these veggie crisps as a snack if you are craving potato chips.
- Serve with something to dip them in like our favorite dipping sauce, homemade ranch dressing, or even a simple marinara sauce.
- These crisps are delicious served alongside chicken vegetable soup or arugula salad for added texture and crunch.
- The parmesan lends its flavor really nicely when served with a rich bolognese sauce. We love it with this meatless Walnut Bolognese.
FAQS
Zucchini is typically available from May through September.
Absolutely! They are a kid-friendly snack option that allows children to enjoy a tasty and nutritious treat while getting some vegetables into their diet.
Storage and reheating tips
- Store any leftovers in an airtight container at room temperature for 1-2 days. Any longer and they start to lose that crunchy, crisp texture.
- Also, avoid refrigeration as that could also make them soft.
- To reheat – place them on a parchment-lined baking sheet and heat at 375 for 2-3 minutes.
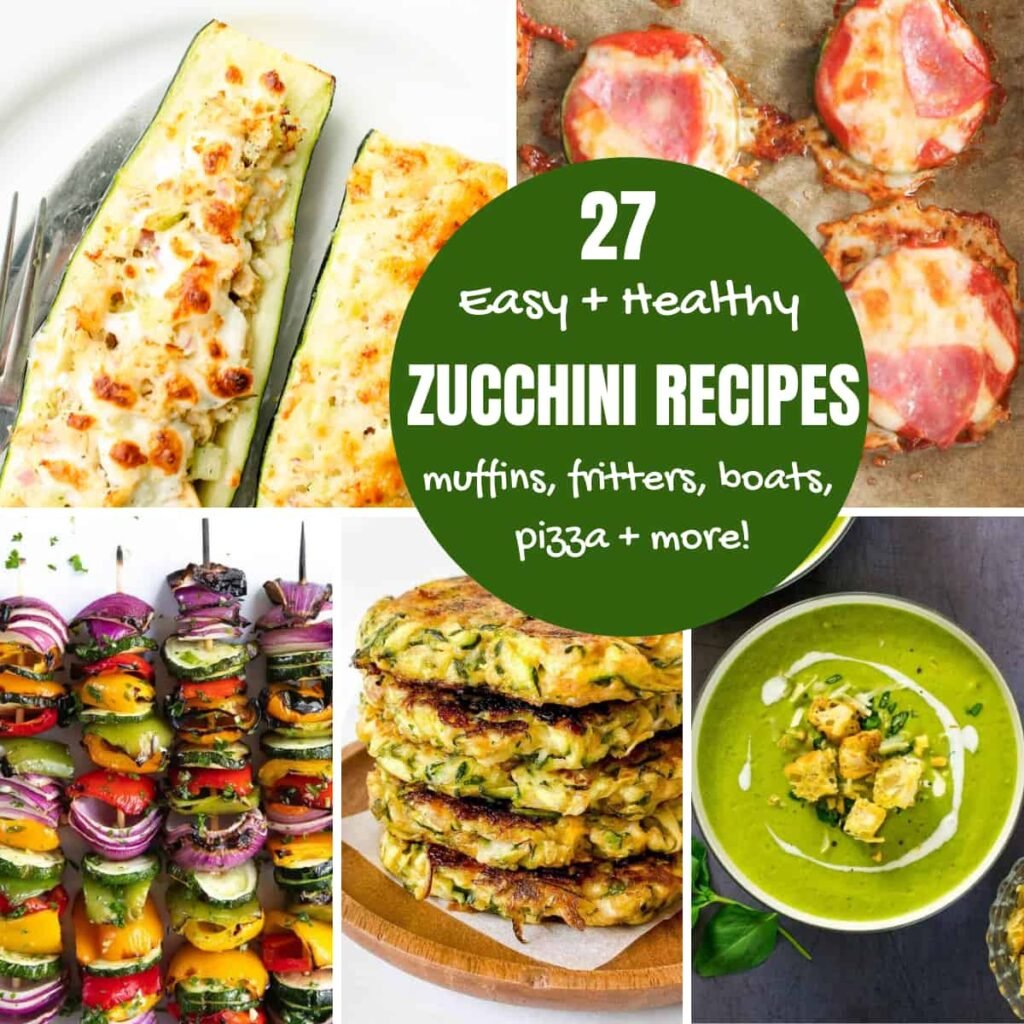
More healthy zucchini recipes
**This recipe was originally posted on November 29, 2013, updated on July 08, 2020, updated again on April 29, 2022, and again on August 4, 2023, with recipe notes, writing, and new photos.**
If you’ve tried our PARMESAN ZUCCHINI CHIPS, please rate the recipe and let me know how it turned out by leaving me a comment below. We’re always interested in feedback!
Be sure to follow me on social media! I love pinning to Pinterest, sharing on Facebook, and posting pics on Instagram. See you there. 🙂
As an Amazon Associate, I earn from qualifying purchases.
Want to Save This Recipe?
Just enter your email and get it sent to your inbox! Plus you’ll get new recipes from us every week.
By submitting this form, you consent to receive emails from The Honour System

Zucchini Parmesan Crisps
Ingredients
- 1 cup shredded parmesan cheese use the real stuff!
- ½ cup shredded zucchini
Instructions
- Preheat oven to 375 and line a baking sheet with parchment paper.
- Press the liquid from the shredded zucchini by laying down a few pieces of paper towel on a cutting board and placing the shredded zucchini on top of it. Cover with another few pieces of paper towel and press down with your hands to squeeze out the moisture. You could also use clean kitchen towels for this!
- Transfer the squeezed dry zucchini to a medium mixing bowl and add the shredded parmesan. Combine the well by mixing with your fingers.
- Spoon heaping tablespoons of the mixture onto the prepared baking sheet. There should be enough for five rows of three.
- Gently even out the piles until they are flat.
- Bake for 8-10 minutes, until the chips are sizzling, the cheese has almost all but melted and the edges are starting to brown. Be careful not to burn them.
- Allow the chips to rest on the baking sheet for about 5 minutes.
Way too mushy! It did not come out anywhere near the photo. Very Dissapointed.
Oh no! That is disappointing. Hmmm…I make these every summer and they always are crispy delicious for me. Maybe I can help you trouble shoot? Did you really squeeze the moisture out of the shredded zucchini before mixing with the cheese? Zucchini can be soggy so it needs to be super dry before mixing with the other ingredients and baking.
YUM! My new favorite way to eat parmesan chips. Such a tasty and easy recipe!
Cute, crunchy and tasty snack. So much fun for kids while cooking and eating these chips. Thank you!
A great way to snack a few veggies into the kids! I love it 🙂
I made these, so so good and I literally finished them by myself. Definitely making agin!
I’ve been known to eat a batch myself too! 😉
This was crispy so flavorful and very addicting will make them again it’s a great recipe!
These were amazing! So easy to make and delicious. We sprinkled ours with a little chilli powder and decorated our salad with them – delicious and impressive looking! Thanks for the recipe!
Love the addition of the chili powder! Yum!
i haven’t heard of PARMESAN ZUCCHINI CHIPS ever before but it looks quite delicious and tasty..will love to check this out,…Thanks for sharing the recipe…
Hope you do try! They are delish. 🙂
We have a bunch of zucchini growing in our garden and I didn’t know what i was going to do with them! Now I know!!! 🙂
Awesome Rachel! I hope you enjoy. 🙂
I love cheese and this parmesan crisp looks really good. Will definitely give this a try.
You won’t be disappointed. Thanks!
My goodness I loveeee anything crunchy and these look perfect for me! Especially to spruce up my salads or have as a nice side dish! Thanks so much because I’ve never heard of this yummy concoction before!
They are awesome as a crunchy side. Thanks, Hannah! 🙂
I have already wanted to try Zucchini chips. I am probably going to try this recipe out sometime this month. I know it’s going to taste amazing.
Thanks, Jasmine! These are super popular around zucchini season for good reason. 😉
These look really delicious! Thanks for sharing this with us!
My pleasure! They are super yummy. 🙂
My kids would love these, zucchini and all! I am fortunate to have kids that love their veggies. These would also make a great garnish!
I’m always happy to hear about kids enjoying veggies. They probably love them because they see you eat them! 😉 Thanks, Marie!!
Wow! This will be a crowd favorite in no time. The texture and color is totally awesome. This definitely looks yummy and delicious plus the added crispiness is what makes this a good snack.
The crispiness is key! Thanks, Gervin.
Great idea..! I love that it only has two ingredients and it’s so easy to make..!
I could not agree more! Thanks Rose 🙂
yummmmm!!! This looks so so good! I can’t wait to make this, it is healthy and looks so good.
Thanks, Chad! It is also super easy. 🙂
Just made it. Quick, easy and yummy.. Great success. Thank you.
Hey, thanks so much for the comment! I appreciate the positivity and am so happy you liked the recipe. I love the parm and zucchini combo. 🙂
Zucchini makes a great ingredient for side dishes to desserts!
Agreed!
These are so pretty and adding the zucchini is genius! I cannot wait to give them a try! Pinning now to make some this week! Thank you!
Ooooh … I’m a genius! I will be passing that along to the the members of my household the next time I can’t find my keys 😉 I hope you love them.
Oh boy, I have a mild addiction to fried cheese (same idea, only you put the grated cheese into a warmed frying pan and let them get crispy)-but these would be super-delish too! Baking them is clever, but adding veggies? Even more clever! Kudos! 🙂
Thanks so much! I love sneaking in the veggies 🙂 Great idea to throw them in a pan also.
Love these – you’d never know there were vegetables in there!!!
Thanks Becca! It’s so true, you can’t tell they’re 1/2 healthy 😉
What an absolutely brilliant idea! I’ve made parmesan crisps before but never thought to add zucchini – a fantastic way of sneaking more veggies in for the kiddo!
Exactly! The bambinos will never know 😉